前端Vue小兔鲜儿电商项目实战Day07
一、会员中心 - 整体功能梳理和路由配置
1. 整体功能梳理
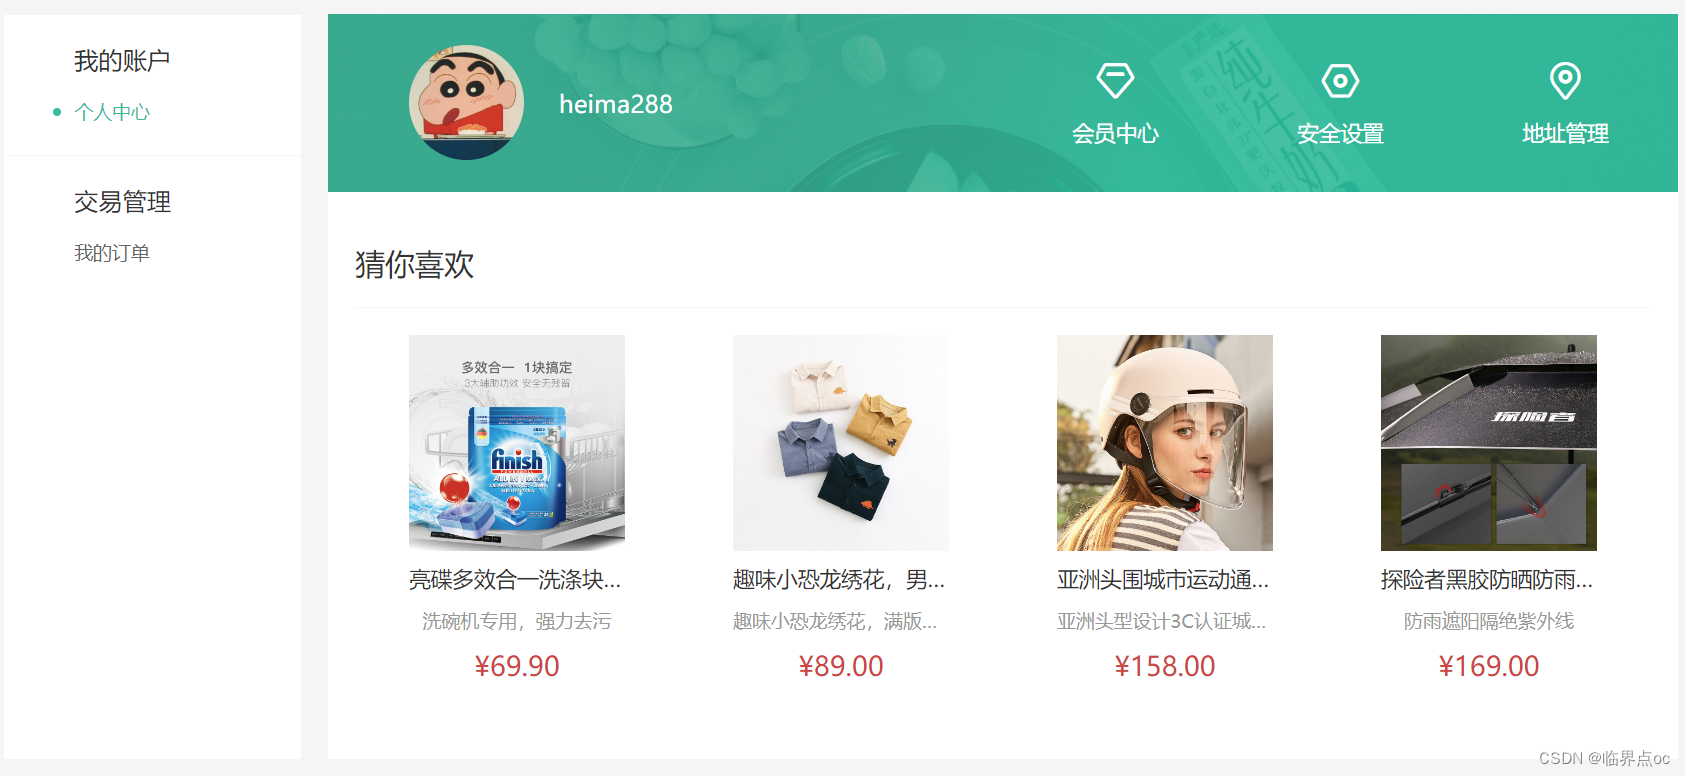
- ①个人中心 - 个人信息和猜你喜欢数据渲染
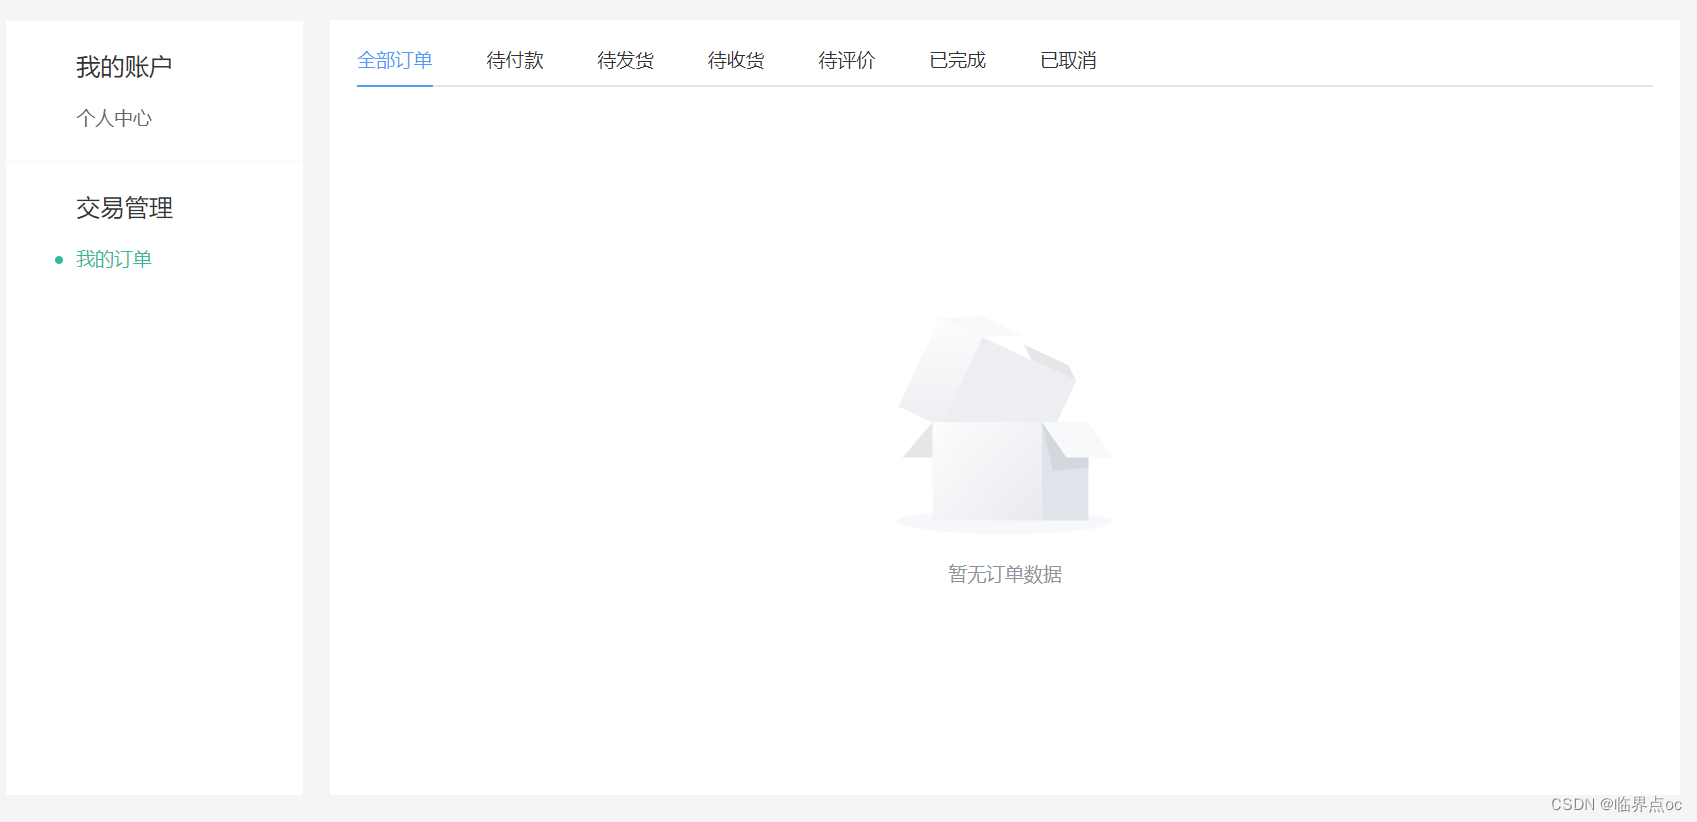
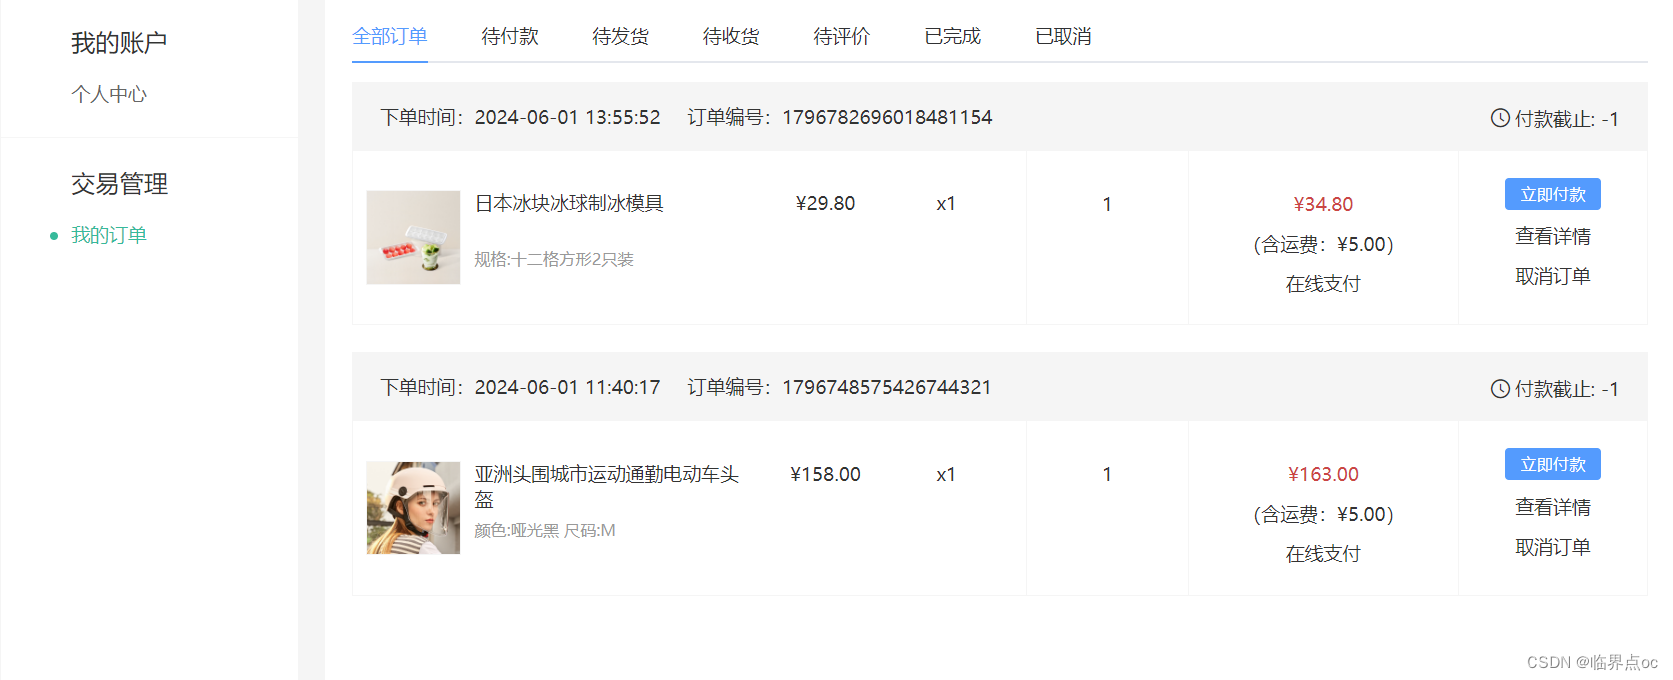
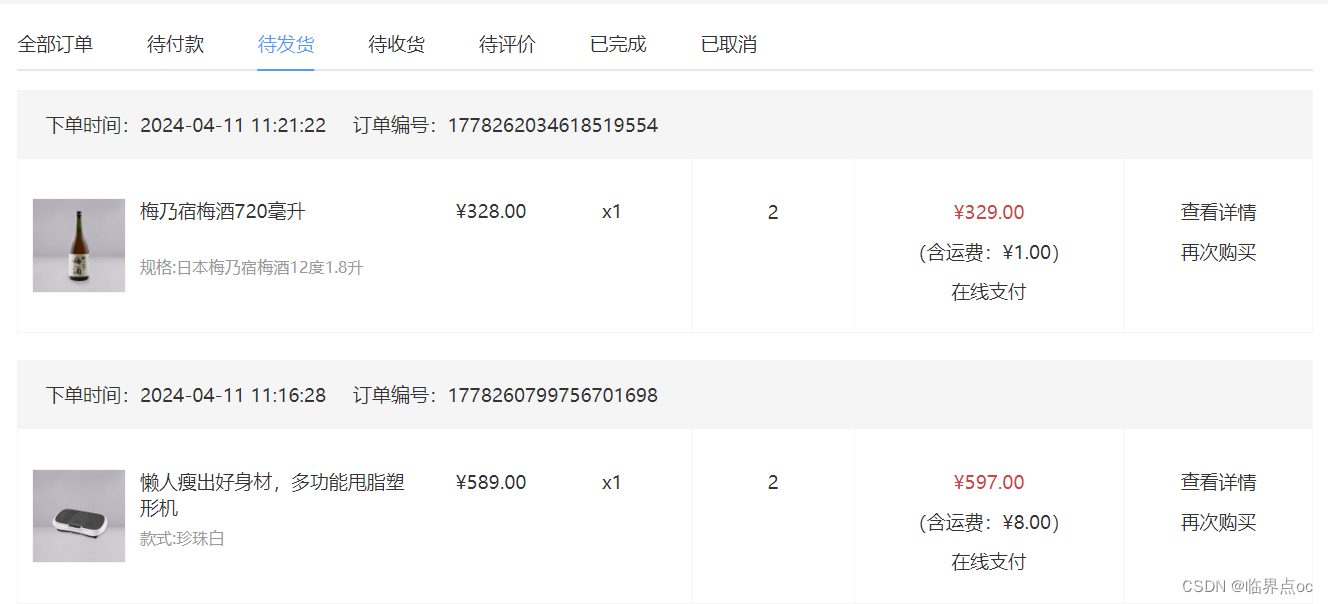
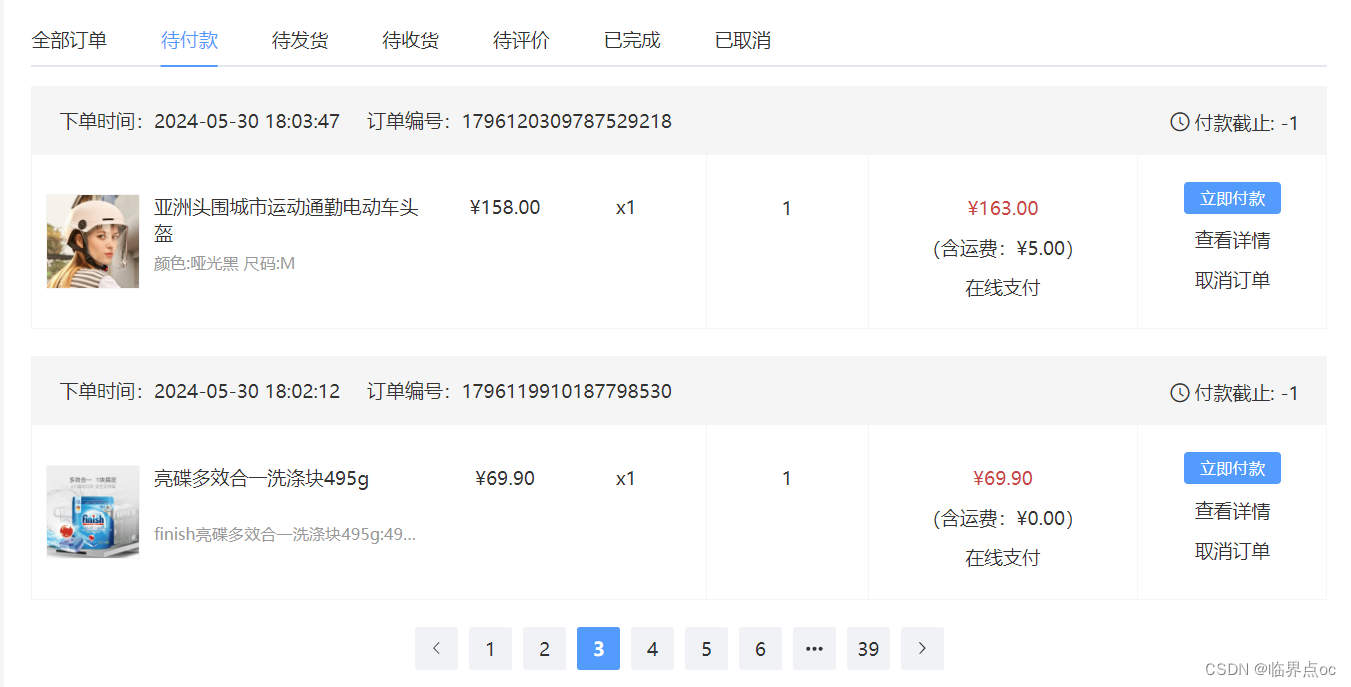
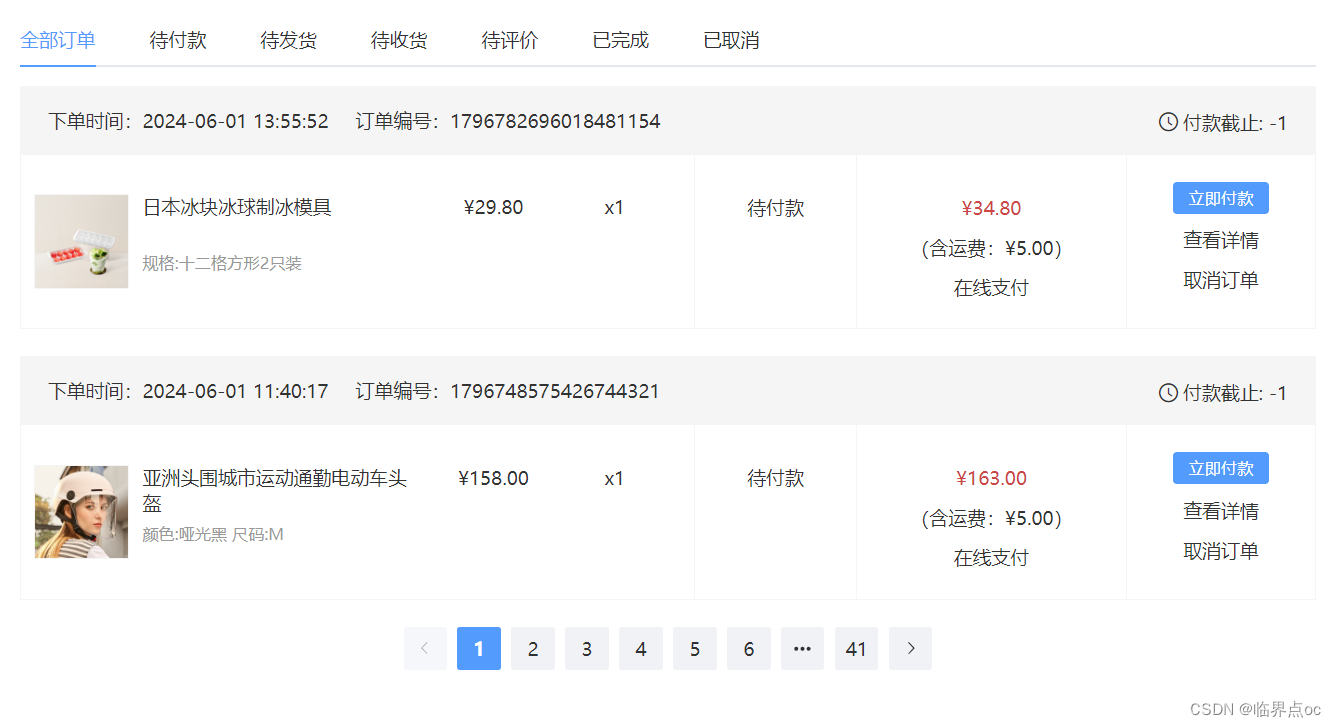
- ②我的订单 - 各种状态下的订单列表展示
2. 路由配置(包括三级路由配置)
①准备个人中心模板组件 - src/views/Member/index.vue
我的账户
个人中心交易管理
我的订单 .container { display: flex; padding-top: 20px; .xtx-member-aside { width: 220px; margin-right: 20px; border-radius: 2px; background-color: #fff; .user-manage { background-color: #fff; h4 { font-size: 18px; font-weight: 400; padding: 20px 52px 5px; border-top: 1px solid #f6f6f6; } .links { padding: 0 52px 10px; } a { display: block; line-height: 1; padding: 15px 0; font-size: 14px; color: #666; position: relative; &:hover { color: $xtxColor; } &.active, &.router-link-exact-active { color: $xtxColor; &:before { display: block; } } &:before { content: ''; display: none; width: 6px; height: 6px; border-radius: 50%; position: absolute; top: 19px; left: -16px; background-color: $xtxColor; } } } } .article { width: 1000px; background-color: #fff; } }②绑定个人中心二级路由 - src/router/index.js
import { createRouter, createWebHistory } from 'vue-router'
// ... ...
import Member from '@/views/Member/index.vue'
const router = createRouter({
  history: createWebHistory(import.meta.env.BASE_URL),
  routes: [
    {
      path: '/',
      component: Layout,
      children: [
        // ... ...
        {
          path: 'member',
          component: Member
        }
      ]
    },
    {
      path: '/login',
      component: Login
    }
  ]
})
export default router
③绑定路由跳转 - src/views/Layout/components/LayoutNav.vue
- a href="javascript:;" @click="$router.push('/member')">会员中心
④准备个人中心和我的订单三级路由组件
src/views/Member/components/UserInfo.vue
const userStore = {}


        {{ userStore.userInfo?.account }}


        会员中心


        安全设置


        地址管理


        猜你喜欢


.home-overview {
  height: 132px;
  background: url(@/assets/images/center-bg.png) no-repeat center / cover;
  display: flex;
  .user-meta {
    flex: 1;
    display: flex;
    align-items: center;
    .avatar {
      width: 85px;
      height: 85px;
      border-radius: 50%;
      overflow: hidden;
      margin-left: 60px;
      img {
        width: 100%;
        height: 100%;
      }
    }
    h4 {
      padding-left: 26px;
      font-size: 18px;
      font-weight: normal;
      color: white;
    }
  }
  .item {
    flex: 1;
    display: flex;
    align-items: center;
    justify-content: space-around;
    &:first-child {
      border-right: 1px solid #f4f4f4;
    }
    a {
      color: white;
      font-size: 16px;
      text-align: center;
      .iconfont {
        font-size: 32px;
      }
      p {
        line-height: 32px;
      }
    }
  }
}
.like-container {
  margin-top: 20px;
  border-radius: 4px;
  background-color: #fff;
}
.home-panel {
  background-color: #fff;
  padding: 0 20px;
  margin-top: 20px;
  height: 400px;
  .header {
    height: 66px;
    border-bottom: 1px solid #f5f5f5;
    padding: 18px 0;
    display: flex;
    justify-content: space-between;
    align-items: baseline;
    h4 {
      font-size: 22px;
      font-weight: 400;
    }
  }
  .goods-list {
    display: flex;
    justify-content: space-around;
  }
}
src/views/Member/components/UserOrder.vue
// tab列表
const tabTypes = [
  { name: 'all', label: '全部订单' },
  { name: 'unpay', label: '待付款' },
  { name: 'deliver', label: '待发货' },
  { name: 'receive', label: '待收货' },
  { name: 'comment', label: '待评价' },
  { name: 'complete', label: '已完成' },
  { name: 'cancel', label: '已取消' }
]
// 订单列表
const orderList = []


              下单时间:{{ order.createTime }}
              订单编号:{{ order.id }}


                付款截止: {{ order.countdown }}
-
{{ item.name }}
{{ item.attrsText }}
¥{{ item.realPay?.toFixed(2) }} x{{ item.quantity }}
{{ order.orderState }}
查看物流
评价商品
查看评价
¥{{ order.payMoney?.toFixed(2) }}
(含运费:¥{{ order.postFee?.toFixed(2) }})
在线支付
立即付款 确认收货查看详情
再次购买
申请售后
取消订单
.order-container { padding: 10px 20px; .pagination-container { display: flex; justify-content: center; } .main-container { min-height: 500px; .holder-container { min-height: 500px; display: flex; justify-content: center; align-items: center; } } } .order-item { margin-bottom: 20px; border: 1px solid #f5f5f5; .head { height: 50px; line-height: 50px; background: #f5f5f5; padding: 0 20px; overflow: hidden; span { margin-right: 20px; &.down-time { margin-right: 0; float: right; i { vertical-align: middle; margin-right: 3px; } b { vertical-align: middle; font-weight: normal; } } } .del { margin-right: 0; float: right; color: #999; } } .body { display: flex; align-items: stretch; .column { border-left: 1px solid #f5f5f5; text-align: center; padding: 20px; > p { padding-top: 10px; } &:first-child { border-left: none; } &.goods { flex: 1; padding: 0; align-self: center; ul { li { border-bottom: 1px solid #f5f5f5; padding: 10px; display: flex; &:last-child { border-bottom: none; } .image { width: 70px; height: 70px; border: 1px solid #f5f5f5; } .info { width: 220px; text-align: left; padding: 0 10px; p { margin-bottom: 5px; &.name { height: 38px; } &.attr { color: #999; font-size: 12px; span { margin-right: 5px; } } } } .price { width: 100px; } .count { width: 80px; } } } } &.state { width: 120px; .green { color: $xtxColor; } } &.amount { width: 200px; .red { color: $priceColor; } } &.action { width: 140px; a { display: block; &:hover { color: $xtxColor; } } } } } }⑤配置三级路由 - src/router/index.js
import { createRouter, createWebHistory } from 'vue-router'
// ... ...
import Member from '@/views/Member/index.vue'
import UserInfo from '@/views/Member/components/UserInfo.vue'
import UserOrder from '@/views/Member/components/UserOrder.vue'
const router = createRouter({
  history: createWebHistory(import.meta.env.BASE_URL),
  routes: [
    {
      path: '/',
      component: Layout,
      children: [
        // ... ...
        {
          path: 'member',
          component: Member,
          children: [
            {
              path: 'user',
              component: UserInfo
            },
            {
              path: 'order',
              component: UserOrder
            }
          ]
        }
      ]
    },
    {
      path: '/login',
      component: Login
    }
  ]
export default router
⑥绑定路由跳转关系 - src/views/Layout/components/LayoutNav.vue
二、会员中心-个人中心信息渲染
1. 使用Pinia数据渲染个人信息 - src/views/Member/UserInfo.vue
// 导入userStore
import { useUserStore } from '@/stores/userStore'
const userStore = useUserStore()


      {{ userStore.userInfo?.account }}
2. 封装 猜你喜欢 接口 - src/apis/user/js
// 获取 “猜你喜欢”数据
export const getLikeListAPI = ({ limit = 4 }) => {
  return instance({
    url: '/goods/relevant',
    params: {
      limit
    }
  })
}
3. 渲染 猜你喜欢 数据 - src/views/Member/UserInfo.vue
import { ref } from 'vue'
import { useUserStore } from '@/stores/user.js'
import GoodsItem from '@/views/Home/components/GoodsItem.vue'
import { getLikeListAPI } from '@/apis/user.js'
const userStore = useUserStore()
const likeList = ref([])
const getLikeList = async () => {
  const res = await getLikeListAPI({ limit: 4 })
  likeList.value = res.result
}
getLikeList()


        猜你喜欢
三、会员中心 - 我的订单
1. 订单基础列表渲染
①封装订单接口 -src/apis/order.js
import instance from '@/utils/http.js'
/*
params: {
  orderState:0,
  page:1,
  pageSize:2
}
*/
export const getUserOrder = (params) => {
  return instance({
    url: '/member/order',
    method: 'GET',
    params
  })
}
如果此处有出现以下问题,在src/utils/http.js里把timeout改大一点!!!
// 创建axios实例
const instance = axios.create({
  baseURL: 'http://pcapi-xiaotuxian-front-devtest.itheima.net',
  timeout: 10000
})
2. tab切换实现
重点:切换tab时修改OrderState参数,再次发起请求获取订单列表数据
①绑定tab-change事件 -src/views/Member/components/UserOrder.vue
// tab切换
const tabChange = (type) => {
  params.value.orderState = type
  getOrderList()
}
3. 分页逻辑实现
①使用列表数据生成分页(页数 = 总条数 / 每页条数)
②切换分页修改page参数,再次获取订单列表数据
src/views/Member/components/UserOrder.vue
import { ref } from 'vue'
import { getUserOrder } from '@/apis/order.js'
// tab列表
const tabTypes = [
  { name: 'all', label: '全部订单' },
  { name: 'unpay', label: '待付款' },
  { name: 'deliver', label: '待发货' },
  { name: 'receive', label: '待收货' },
  { name: 'comment', label: '待评价' },
  { name: 'complete', label: '已完成' },
  { name: 'cancel', label: '已取消' }
]
// 订单列表
const orderList = ref([])
const total = ref(0)
const params = ref({
  orderState: 0,
  page: 1,
  pageSize: 2
})
const getOrderList = async () => {
  const res = await getUserOrder(params.value)
  //   console.log(res)
  orderList.value = res.result.items
  total.value = res.result.counts
}
getOrderList()
// tab切换
const tabChange = (type) => {
  //   console.log(type)
  params.value.orderState = type
  getOrderList()
}
// 页数切换
const pageChange = (page) => {
  console.log(page)
  params.value.page = page
  getOrderList()
}


              下单时间:{{ order.createTime }}
              订单编号:{{ order.id }}


                付款截止: {{ order.countdown }}
-
{{ item.name }}
{{ item.attrsText }}
¥{{ item.realPay?.toFixed(2) }} x{{ item.quantity }}
{{ order.orderState }}
查看物流
评价商品
查看评价
¥{{ order.payMoney?.toFixed(2) }}
(含运费:¥{{ order.postFee?.toFixed(2) }})
在线支付
立即付款 确认收货查看详情
再次购买
申请售后
取消订单
4. 会员中心 - 细节优化
①默认三级路由设置
效果:当路由path为二级路由路径member的时候,右侧可以显示个人中心三级路由对应的组件
src/router/index.js
import { createRouter, createWebHistory } from 'vue-router'
// ... ...
const router = createRouter({
  history: createWebHistory(import.meta.env.BASE_URL),
  routes: [
    {
      path: '/',
      component: Layout,
      children: [
        // ... ...
        {
          path: 'member',
          component: Member,
          redirect: 'member/user',
          children: [
            {
              path: 'user',
              component: UserInfo
            },
            {
              path: 'order',
              component: UserOrder
            }
          ]
        }
      ]
    },
    {
      path: '/login',
      component: Login
    }
  ],
  // ... ...
})
export default router
②订单状态显示适配
思路:根据接口文档给到的状态码和中文的对应关系进行适配
四、拓展课 - SKU组件封装
1. 认识SKU组件
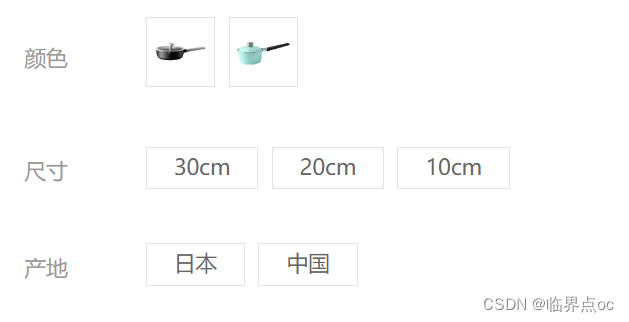
SKU组件的作用是为了让用户能够选择商品的规格,从而提交购物车,在选择的过程中,组件的选中状态要进行更新,组件还要提示用户当前规格是否禁用,每次选中都要产出对应的Sku数据
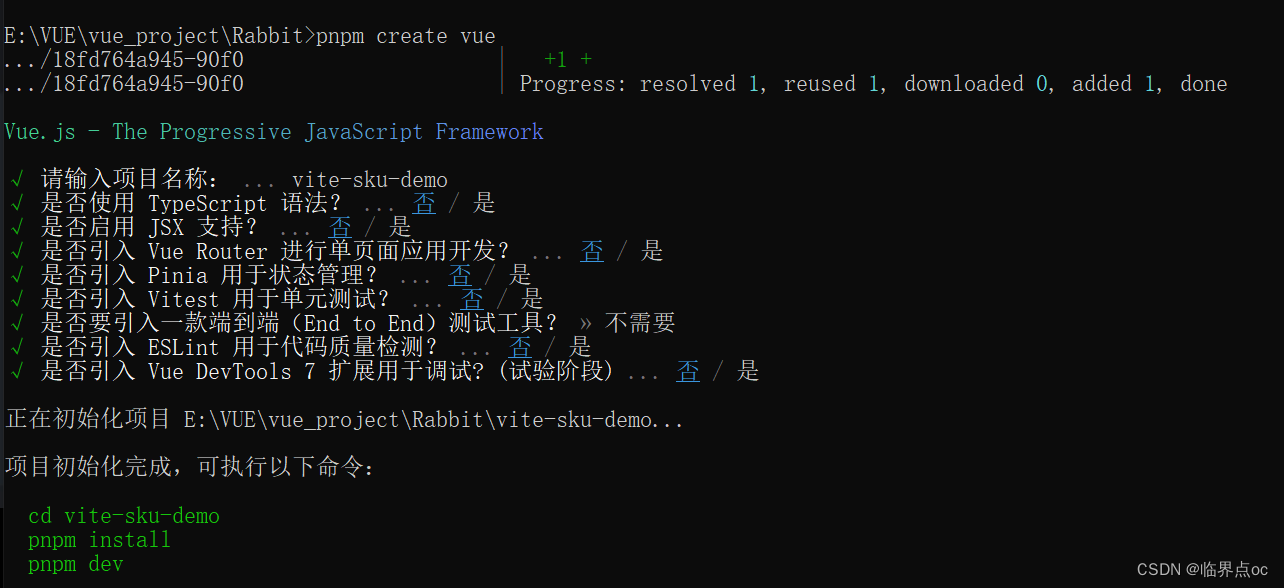
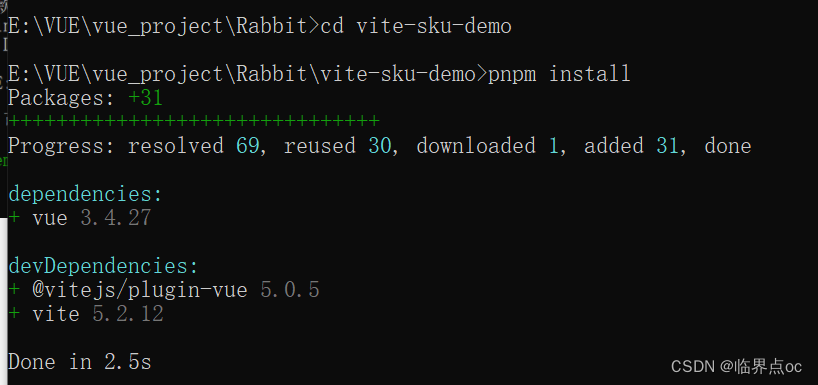
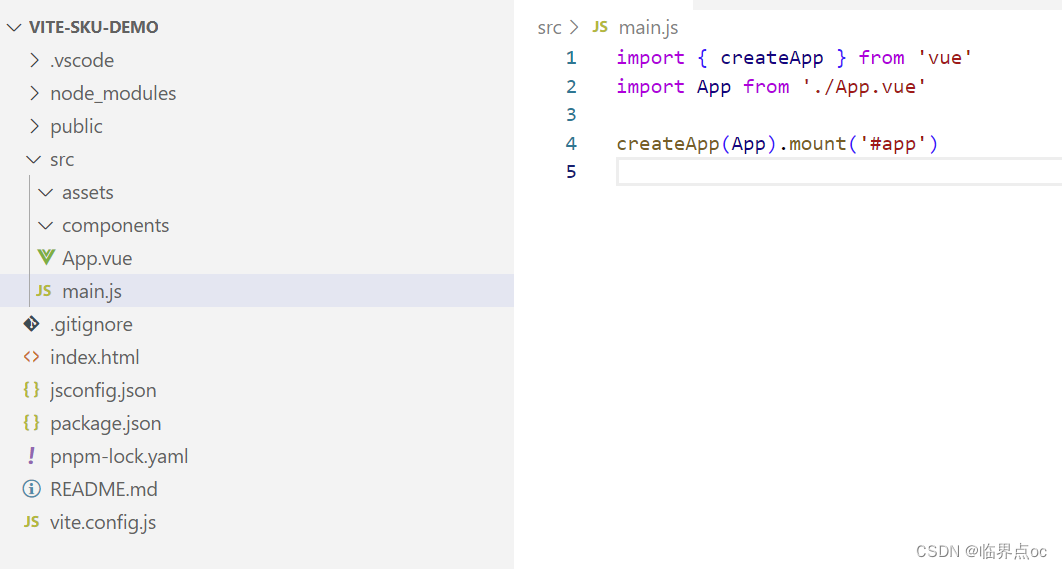
①创建项目 vite-sku-demo
清空无关的文件
②安装axios和sass
pnpm add sass -D
pnpm add axios
③初始化规格渲染 -src/Sku/Sku.vue
import { onMounted, ref } from 'vue'
import axios from 'axios'
// 商品数据
const goods = ref({})
const getGoods = async () => {
  // 1135076  初始化就有无库存的规格
  // 1369155859933827074 更新之后有无库存项(蓝色-20cm-中国)
  const res = await axios.get('http://pcapi-xiaotuxian-front-devtest.itheima.net/goods?id=1369155859933827074')
  goods.value = res.data.result
}
onMounted(() => getGoods())


      {{ item.name }}


          {{ val.name }}


@mixin sku-state-mixin {
  border: 1px solid #e4e4e4;
  margin-right: 10px;
  cursor: pointer;
  &.selected {
    border-color: #27ba9b;
  }
  &.disabled {
    opacity: 0.6;
    border-style: dashed;
    cursor: not-allowed;
  }
}
.goods-sku {
  padding-left: 10px;
  padding-top: 20px;
  dl {
    display: flex;
    padding-bottom: 20px;
    align-items: center;
    dt {
      width: 50px;
      color: #999;
    }
    dd {
      flex: 1;
      color: #666;
      >img {
        width: 50px;
        height: 50px;
        margin-bottom: 4px;
        @include sku-state-mixin;
      }
      >span {
        display: inline-block;
        height: 30px;
        line-height: 28px;
        padding: 0 20px;
        margin-bottom: 4px;
        @include sku-state-mixin;
      }
    }
  }
}
④在App.vue中导入渲染
import Sku from '@/Sku/Sku.vue'
2. 点击规格更新选中状态
核心思路:
- ①如何当前已经激活,就取消激活
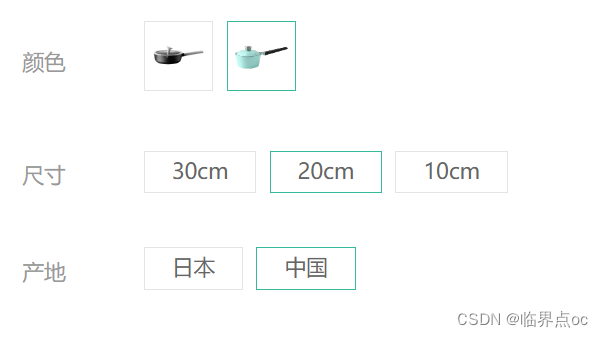
- ②如果当前未激活,就把和自己同排的其他规格取消激活,再把自己激活
响应式数据设计:每一个规格项都添加一个selected字段来决定是否激活,true为激活,false为未激活。
样式处理:使用selected配合动态class属性,selected为true就显示对应激活类名
src/Sku/Sku.vue
import { onMounted, ref } from 'vue'
import axios from 'axios'
// 商品数据
const goods = ref({})
const getGoods = async () => {
  // 1135076  初始化就有无库存的规格
  // 1369155859933827074 更新之后有无库存项(蓝色-20cm-中国)
  const res = await axios.get('http://pcapi-xiaotuxian-front-devtest.itheima.net/goods?id=1369155859933827074')
  goods.value = res.data.result
}
onMounted(() => getGoods())
// 切换选中状态
const changeSelectedStatus = ( item, val ) => {
  // item: 同一排的对象,val:当前点击项
  if ( val.selected ) {
    val.selected = false
  } else {
    item.values.forEach( val => val.selected = false )
    val.selected = true
  }
}


      {{ item.name }}


          {{ val.name }}
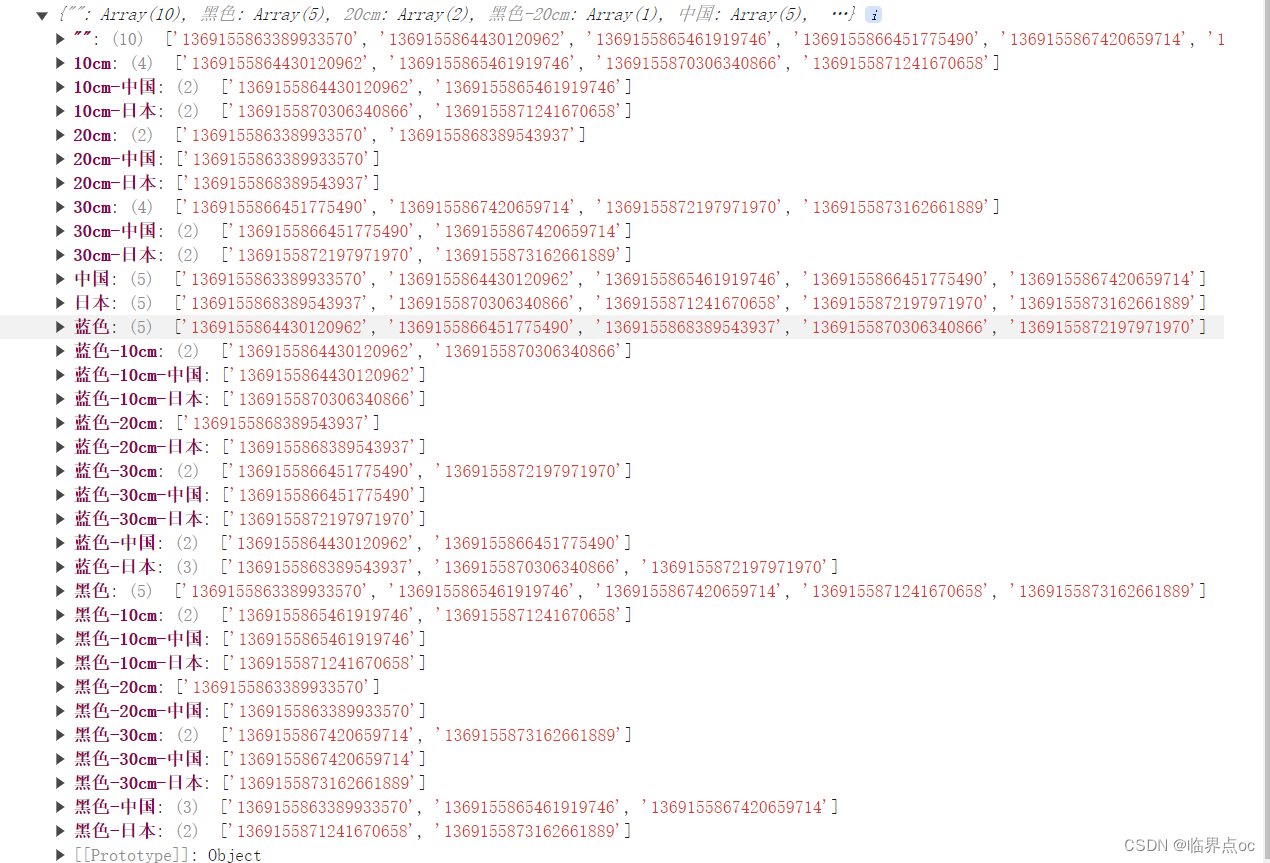
3. 点击规格更新禁用状态 - 生成有效路径字典
规格禁用的判断依据是什么?
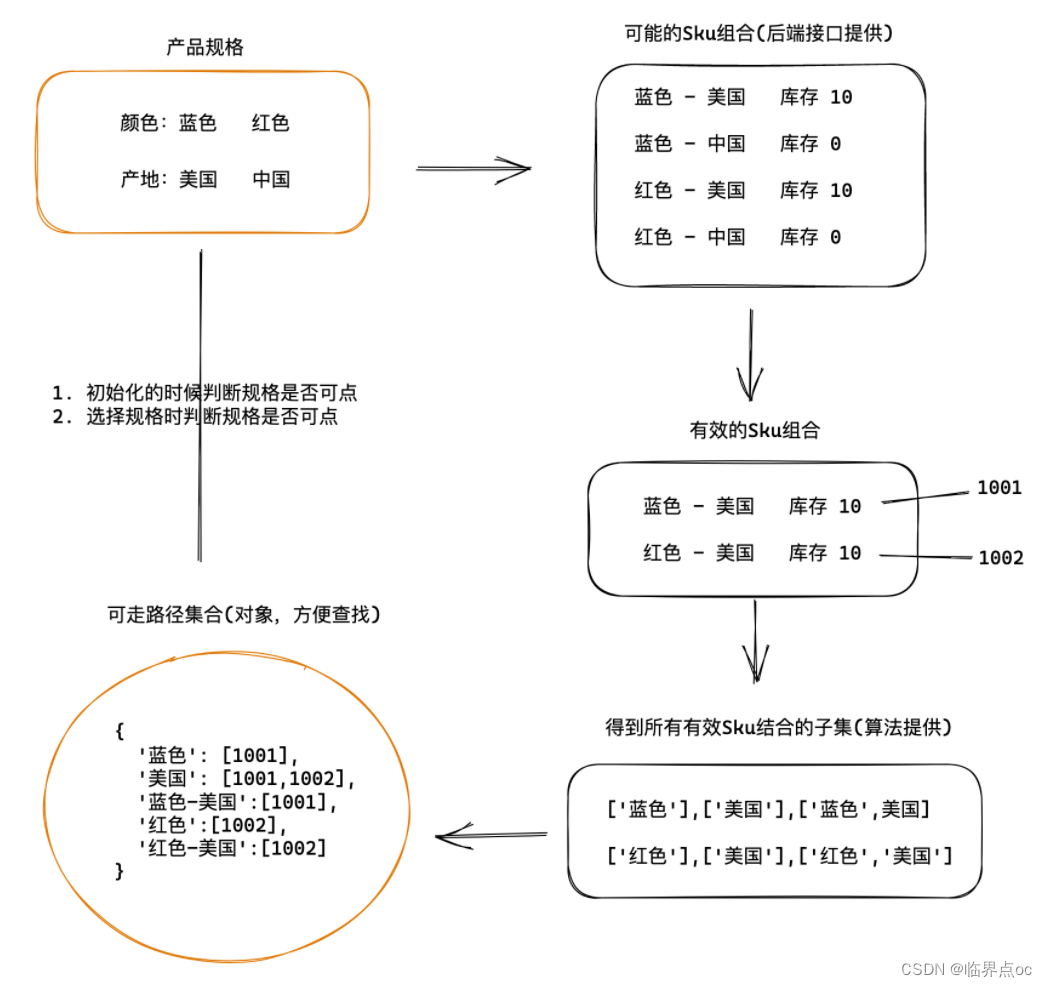
 核核心原理:当前的规格Sku,或者组合起来的规格Sku,在skus数组中对应项的库存为零时,当前规格会被禁用,生成路径字典是为了协助和简化这个匹配过程。
实现步骤:
- ①根据库存字段得到有效的Sku数组
- ②根据有效的Sku数组使用powerSet算法得到所有子集
- ③根据子集生成路径字典对象
①powerSet算法 - src/Sku/power-set.js
export default function bwPowerSet (originalSet) {
    const subSets = []

    // We will have 2^n possible combinations (where n is a length of original set).
    // It is because for every element of original set we will decide whether to include
    // it or not (2 options for each set element).
    const numberOfCombinations = 2 ** originalSet.length

    // Each number in binary representation in a range from 0 to 2^n does exactly what we need:
    // it shows by its bits (0 or 1) whether to include related element from the set or not.
    // For example, for the set {1, 2, 3} the binary number of 0b010 would mean that we need to
    // include only "2" to the current set.
    for (let combinationIndex = 0; combinationIndex  getGoods())
// 切换选中状态
const changeSelectedStatus = ( item, val ) => {
  // item: 同一排的对象,val:当前点击项
  if ( val.selected ) {
    val.selected = false
  } else {
    item.values.forEach( val => val.selected = false )
    val.selected = true
  }
}
// 生成有效路径字典对象
const getPathMap = (goods) => {
  const pathMap = {}
  // 1. 根据skus字段生成有效的sku数组
  const effectiveSkus = goods.skus.filter(sku => sku.inventory > 0)
  // 2. 根据有效的sku使用powerSet算法得到所有子集
  effectiveSkus.forEach(sku => {
    // 2.1 获取匹配的valueName组成的数组
    const selectedValArr = sku.specs.map(val => val.valueName)
    // 2.2 使用算法获取子集
    const valueArrPowerSet = powerSet(selectedValArr)
    // 3. 把得到子集生成最终的路径字典对象
    valueArrPowerSet.forEach(arr => {
      // 初始化key 数据join -> 字符串 对象的key
      const key = arr.join('-')
      // 如果已经存在当前key了,就往数组中直接添加skuId, 如果不存款key,直接做赋值
      if( pathMap[key] ) {
        pathMap[key].push(sku.id)
      } else {
        pathMap[key] = [sku.id]
      }
    })
  })
  return pathMap
}
4. 点击规格更新禁用状态 - 初始化规格禁用
思路:遍历每一个规格对象,使用name字段作为key去路径字典pathMap中做匹配,匹配不上则禁用
怎么做到显示上的禁用呢?
- ①通过增加disabled字段,匹配上路径字段,disable为false;匹配不上路径字段,disabled为true
- ②配合动态类名控制禁用类名
import { onMounted, ref } from 'vue'
import axios from 'axios'
import powerSet from './power-set.js'
// 商品数据
const goods = ref({})
const getGoods = async () => {
  // 1135076  初始化就有无库存的规格
  // 1369155859933827074 更新之后有无库存项(蓝色-20cm-中国)
  const res = await axios.get('http://pcapi-xiaotuxian-front-devtest.itheima.net/goods?id=1135076')
  goods.value = res.data.result
  const pathMap = getPathMap(goods.value)
  console.log(pathMap)
  initDisabledStatus(goods.value.specs, pathMap)
}
onMounted(() => getGoods())
// ... ...
// 初始化禁用状态
const initDisabledStatus = (specs, pathMap) => {
  specs.forEach(spec => {
    spec.values.forEach(val => {
      if( pathMap[val.name] ) {
        val.disabled = false
      } else {
        val.disabled = true
      }
    })
  })
}


      {{ item.name }}


          {{ val.name }}
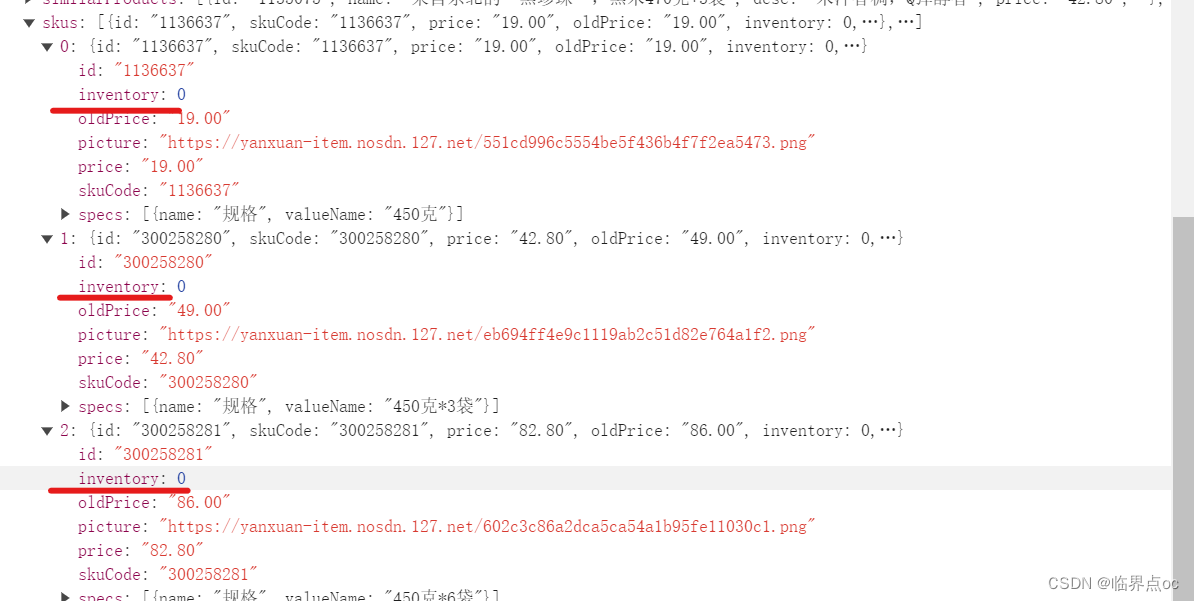
给的例子中该商品的所有规格的库存都为0,因为三张图片都会显示禁用状态!!!
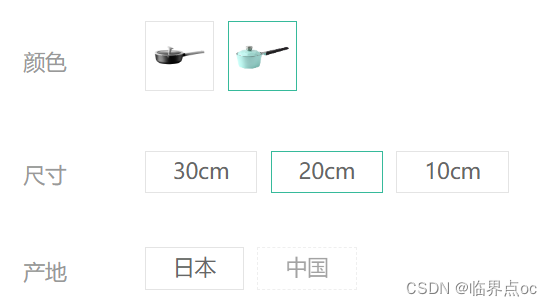
5. 点击规格更新状态 - 点击时组合禁用更新
思路(点击规格时):
①按照顺序得到规格选中项的数组 ['蓝色', '20cm', undefined]
②遍历每一个规格
- 把name字段的值填充到对应的位置
- 过滤掉undefined项使用join方法形成一个有效的key
- 使用key去pathMap中进行匹配,匹配不上,则当前项禁用
// ... ...
// 商品数据
const goods = ref({})
let pathMap = {}
const getGoods = async () => {
  // 1135076  初始化就有无库存的规格
  // 1369155859933827074 更新之后有无库存项(蓝色-20cm-中国)
  const res = await axios.get('http://pcapi-xiaotuxian-front-devtest.itheima.net/goods?id=1369155859933827074')
  goods.value = res.data.result
  pathMap = getPathMap(goods.value)
  console.log(pathMap)
  // 初始化更新按钮状态
  initDisabledState(goods.value.specs, pathMap)
}
// ... ...
// 获取选中项的匹配数组
const getSelectedValues = (specs) => {
  const arr = []
  specs.forEach(spec => {
    // 目标:找到values中的selected为true的项,然后把它的name字段添加到数组对应的位置
    const selectedVal = spec.values.find(value => value.selected)
    arr.push(selectedVal ? selectedVal.name : undefined)
  })
  return arr
}
// 切换时更新禁用状态
const updateDisabledStatus = (specs, pathMap) => {
  // 约定:每一个按钮的状态由自身的disabled进行控制
  specs.forEach((item, i) => {
    const selectedValues = getSelectedValues(specs)
    item.values.forEach(val => {
      if(val.selected) return
      const _selelctedValues = [...selectedValues]
      _selelctedValues[i] = val.name
      const key = _selelctedValues.filter(value => value).join('-')
      // 路径字典中查找是否有数据,有->可以点击;没有->禁用
      val.disabled = !pathMap[key]
    })
  })
}
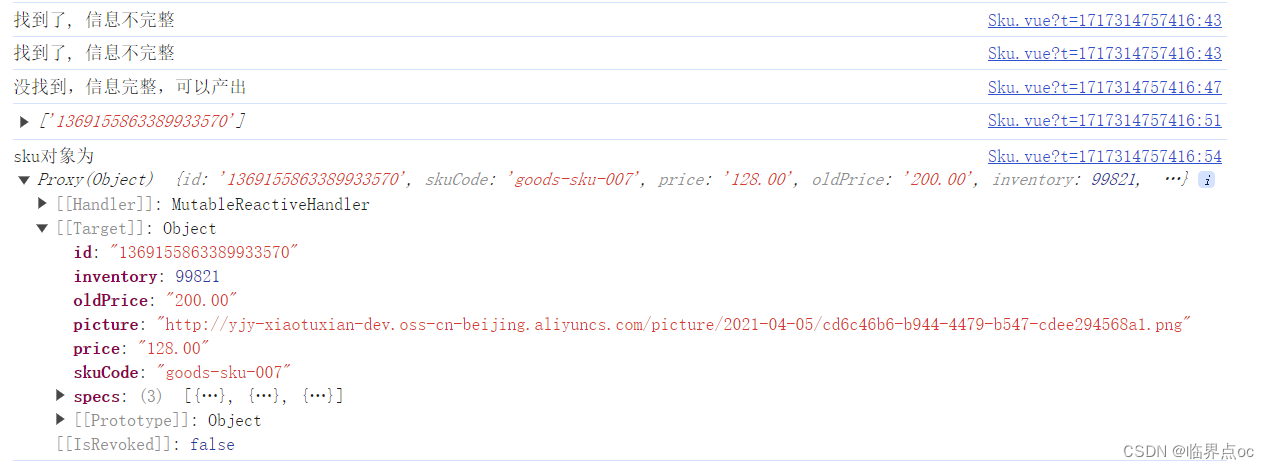
6. 产出有效的SKU信息
1. 什么时有效的SKU?
2. 如何判断当前用户已经选择了所有有效的规格?
已选择项数组['蓝色', '20cm', undefined]中找不到undefined,那么用户已经选择了所有的有效规格,此时可以产出数据。
3. 如何获取当前的SKU信息对象?
把已选择项数组拼接为路径字典的key,去路径字典pathMap中找即可。
// 切换选中状态
const changeSelectedStatus = ( item, val ) => {
  if(val.disabled) return
  // item: 同一排的对象,val:当前点击项
  if ( val.selected ) {
    val.selected = false
  } else {
    item.values.forEach( val => val.selected = false )
    val.selected = true
  }
  // 点击按钮时更新
  updateDisabledStatus(goods.value.specs, pathMap)
  // 产出SKU对象数据
  const index = getSelectedValues(goods.value.specs).findIndex(item => item === undefined)
  if(index > -1) {
    // 找到, 信息不完整
    console.log('找到了, 信息不完整')

  } else {
    // 没找到,信息完整,可以产出
    console.log('没找到,信息完整,可以产出')
    // 获取sku对象
    const key = getSelectedValues(goods.value.specs).join('-')
    const skuIds = pathMap[key]
    console.log(skuIds)
    // 以skuId作为匹配项去goods.value.skus数组中找
    const skuObj = goods.value.skus.find(item => item.id === skuIds[0])
    console.log('sku对象为', skuObj)
  }
}
完结撒花!!!


