electron打包Vue前端
Electron-Forge 打包Vue项目
效果:electronforge可将前端静态页面打包成.exe、.deb和.rpm等,能适配各种平台
-
示例:Windows环境下将前端 Vue 项目打包成exe文件
-
打包后的 exe 文件
-
运行 exe 文件
一、项目准备
开源项目 RouYi 下载
- 本地环境
# 环境版本信息
node -v  # v20.11.1
npm -v  # 10.2.4
# 设置源
npm config set registry https://registry.npmmirror.com/
# 查看 node 源
npm config get registry
- 安装依赖
# 切换到Vue前端项目
cd ruoyi-ui
# 安装Vue所需依赖
npm install
# 运行 Vue 项目
npm run dev
- 报错
-
3.1 原因:Node版本高了
-
3.2 修改 package.json
-
3.3 修改后的 package.json
  "scripts": {
    "dev": "SET NODE_OPTIONS=--openssl-legacy-provider && vue-cli-service serve",
    "build:prod": "vue-cli-service build",
    "build:stage": "vue-cli-service build --mode staging",
    "preview": "node build/index.js --preview",
    "lint": "eslint --ext .js,.vue src"
  },
二、项目配置
2. 修改项目配置
ruoyi-ui 下的配置修改
2.1 .env.production
# 修改前
VUE_APP_BASE_API = '/prod-api'
# 修改后(与后端保持一致)
VUE_APP_BASE_API = 'http://localhost:8080'
2.2 vue.config.js
# 修改前:静态资源路径
publicPath: process.env.NODE_ENV === "production" ? "/" : "/",
# 修改后
publicPath: './',

# 实际接口地址与后端Sprintboot项目保持一致
target: `http://localhost:8080`,
2.3 修改路由配置
进入 ruoyi-ui/src/router/index.js
# 修改前:url不带#
mode: 'history'
# 修改后:url带#
mode: 'hash'
2.4 全局修改Cookies为localStorage
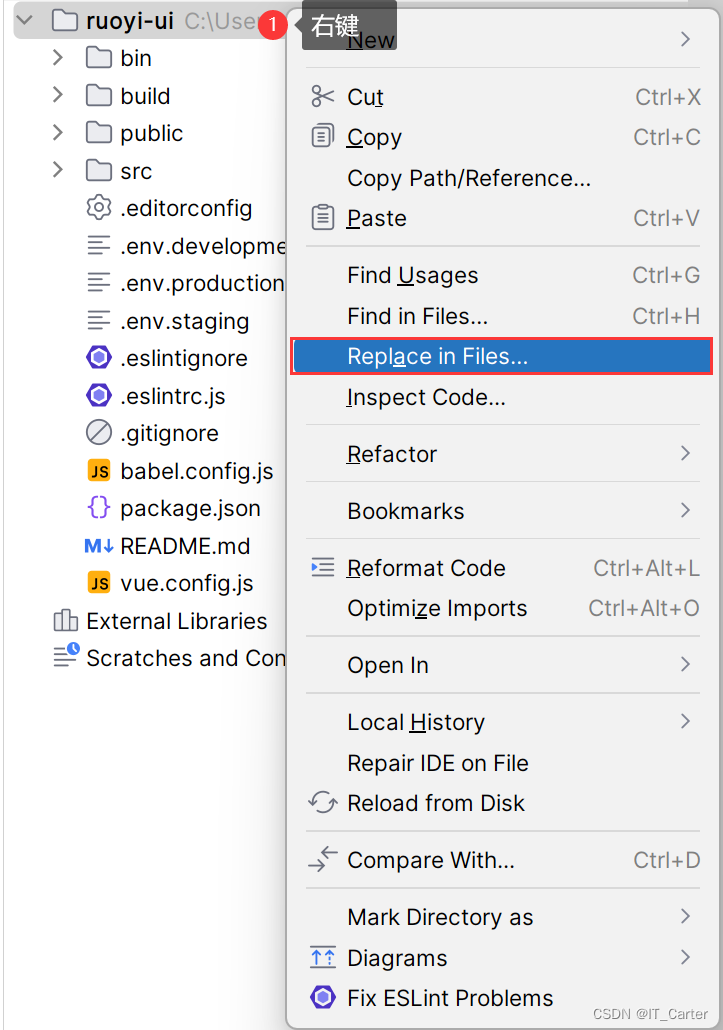
由于打包成exe或deb这类可执行文件后,本地是没有 Cookies
-
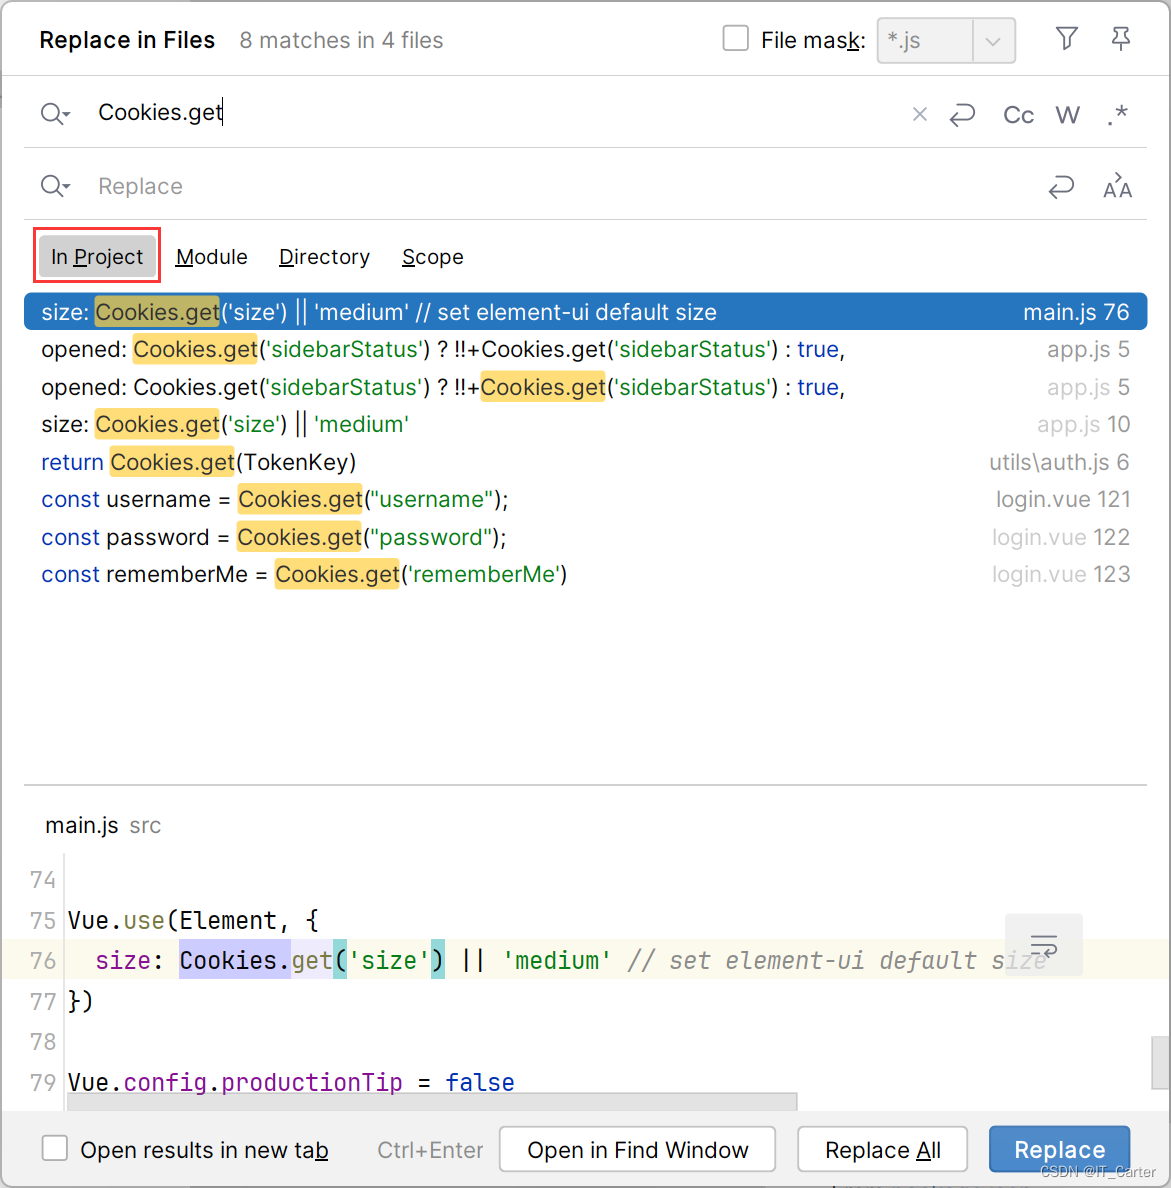
全局搜索Cookies.get并替换为localStorage.getItem
-
全局搜索Cookies.set并替换为localStorage.setItem
-
全局搜索Cookies.remove并替换为localStorage.removeItem
-
进入ruoyi-ui/src/views/login.vue
- 修改前
localStorage.setItem("username", this.loginForm.username, { expires: 30 }); localStorage.setItem("password", encrypt(this.loginForm.password), { expires: 30 }); localStorage.setItem('rememberMe', this.loginForm.rememberMe, { expires: 30 });- 修改后
localStorage.setItem("username", this.loginForm.username);
localStorage.setItem("password", encrypt(this.loginForm.password));
localStorage.setItem('rememberMe', this.loginForm.rememberMe);
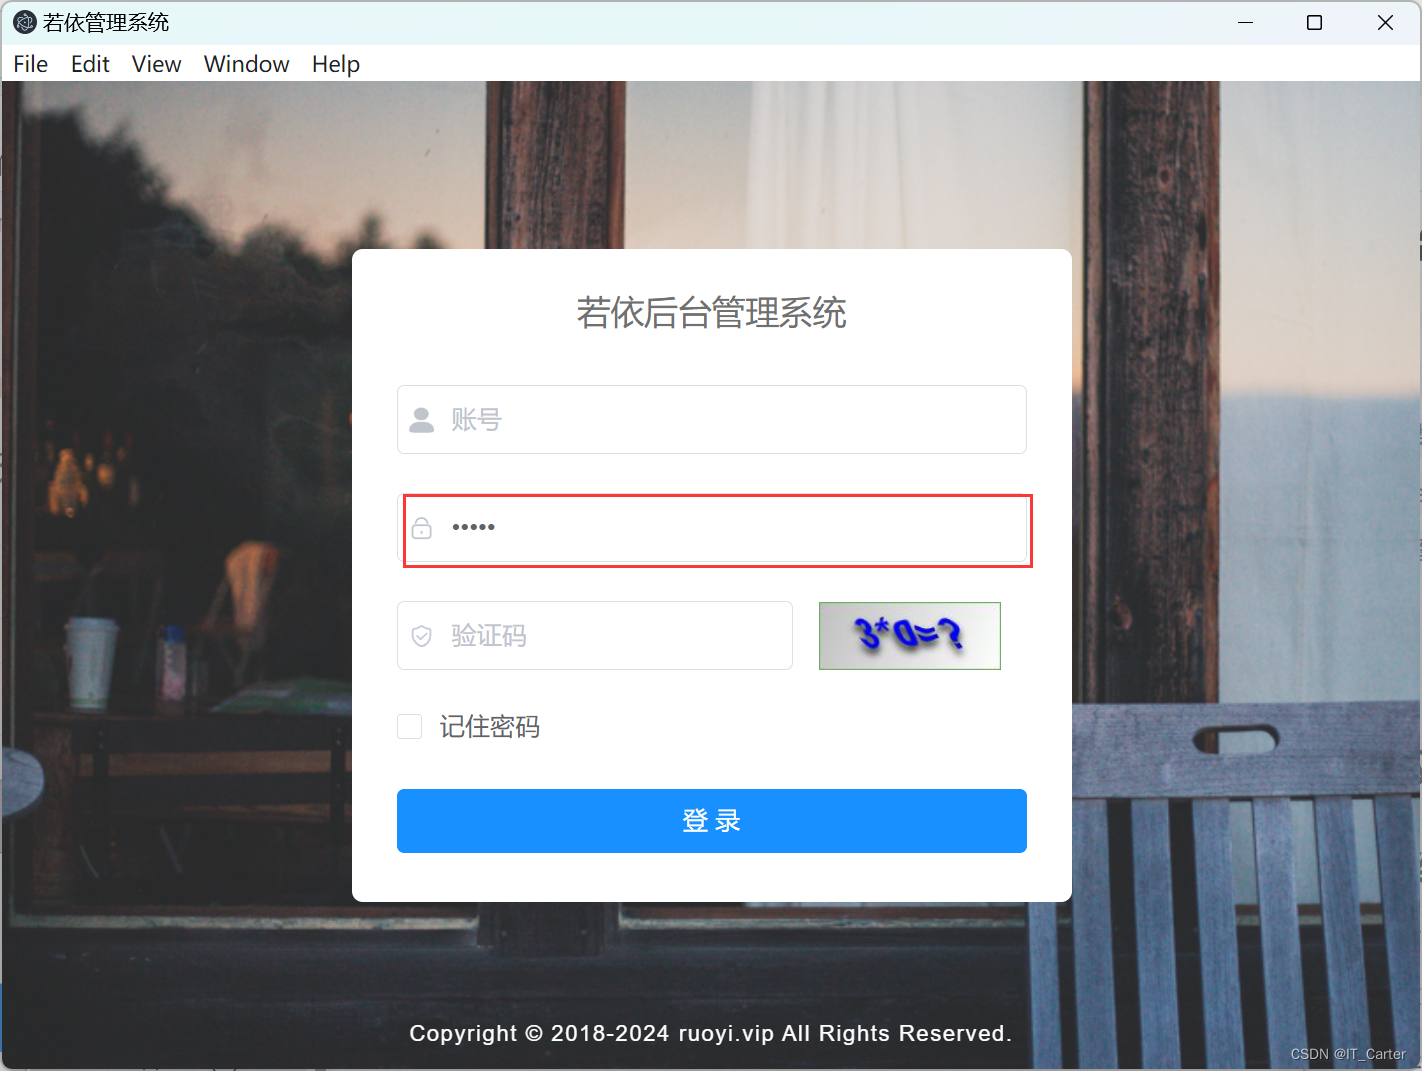
防止登录界面错乱显示
getCookie() {
  const username = localStorage.getItem("username");
  const password = localStorage.getItem("password");
  const rememberMe = localStorage.getItem('rememberMe');
  // 由于localStorage获取值时,没有值默认是 null 而不是 undefined
  this.loginForm = {
    username: username === null ? this.loginForm.username : username,
    password: password === null ? this.loginForm.password : decrypt(password),
    rememberMe: rememberMe === null ? false : Boolean(rememberMe)
  };
},
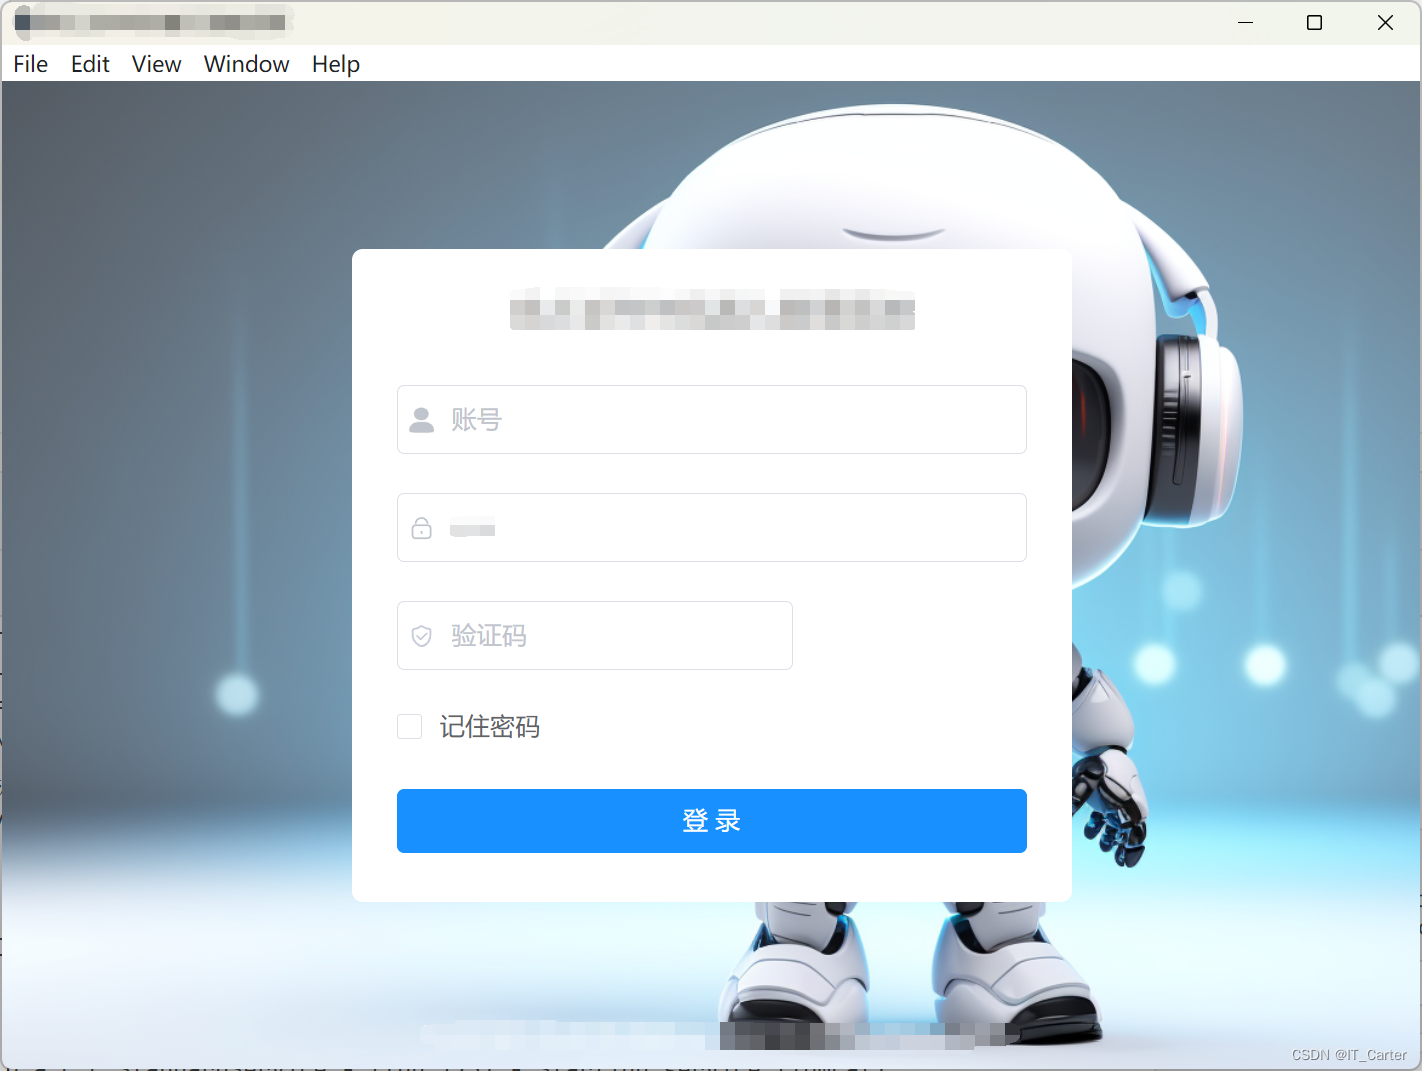
错乱显示示例
2.5 退出登录白页问题
进入 ruoyi-ui/src/layout/components/Navbar.vue
-
修改前
-
修改后
    async logout() {
      this.$confirm('确定注销并退出系统吗?', '提示', {
        confirmButtonText: '确定',
        cancelButtonText: '取消',
        type: 'warning'
      }).then(() => {
        this.$store.dispatch('LogOut').then(() => {
          this.$router.push('/login')
        })
      }).catch(() => {});
    }
2.6 无效会话 401
src/utils/request.js
修改前
if (code === 401) {
  if (!isRelogin.show) {
    isRelogin.show = true;
    MessageBox.confirm('登录状态已过期,您可以继续留在该页面,或者重新登录', '系统提示', { confirmButtonText: '重新登录', cancelButtonText: '取消', type: 'warning' }).then(() => {
      isRelogin.show = false;
      store.dispatch('LogOut').then(() => {
        location.href = '/index';
      })
  }).catch(() => {
    isRelogin.show = false;
  });
}
修改后
if (code === 401) {
  if (!isRelogin.show) {
    isRelogin.show = true;
    MessageBox.confirm('登录状态已过期,您可以继续留在该页面,或者重新登录', '系统提示', { confirmButtonText: '重新登录', cancelButtonText: '取消', type: 'warning' }).then(() => {
      isRelogin.show = false;
      store.dispatch('LogOut').then(() => {
        location.href = '/#/login';
        // 或者
        // location.href = '/';
      })
  }).catch(() => {
    isRelogin.show = false;
  });
}
三、开始打包
3.1 打包 Vue
npm run build:prod
-
报错
-
原因
node版本过高
-
解决方案
进入 ruoyi-ui/package.json
-
修改前
-
修改后
"scripts": {
    "dev": "SET NODE_OPTIONS=--openssl-legacy-provider && vue-cli-service serve",
    "build:prod": "SET NODE_OPTIONS=--openssl-legacy-provider && vue-cli-service build",
    "build:stage": "vue-cli-service build --mode staging",
    "preview": "node build/index.js --preview",
    "lint": "eslint --ext .js,.vue src"
  },
以上配置修改后,重新执行打包命令
npm run build:prod
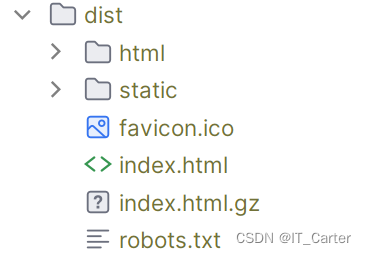
打包好后出现 ruoyi-ui/dist 文件夹
3.1 下载 electron 骨架项目
第一步:下载把electron官方例子
git clone https://github.com/electron/electron-quick-start
第二步:配置项目
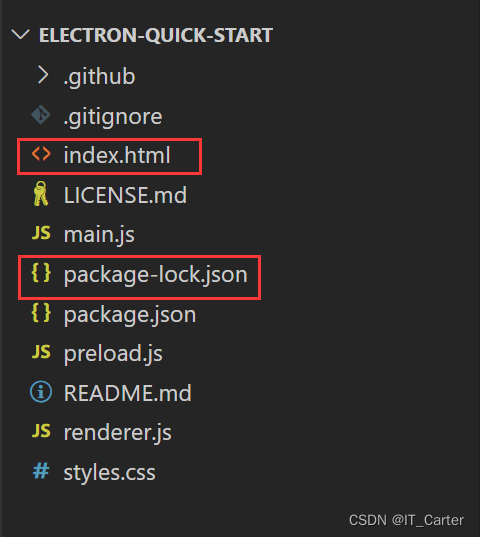
- 2.1 删除 index.html 和 package-lock.json
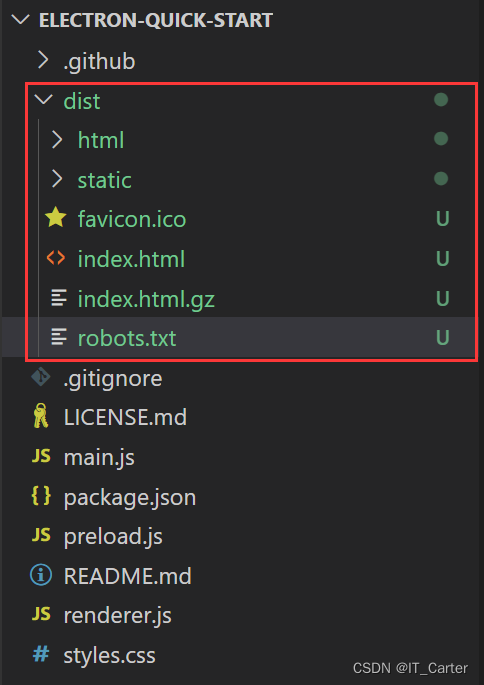
- 2.2 将 Vue 打包后的dist放入项目 electron-quick-start 根目录上
- 2.3 入口文件 main.js ,修改打包的文件路径为我们的index.html
// 原始内容 mainWindow.loadFile('index.html') // 修改后的内容 mainWindow.loadFile('./dist/index.html')- 2.4 进入 package.json
// 原始内容 "devDependencies": { "electron": "^29.2.0" } // 修改后的内容 "devDependencies": {}第三步:安装依赖
- 2.1 配置npm
如果不配置,为 electron-quick-start 项目下载 electron 超级慢,甚至下载失败!!!
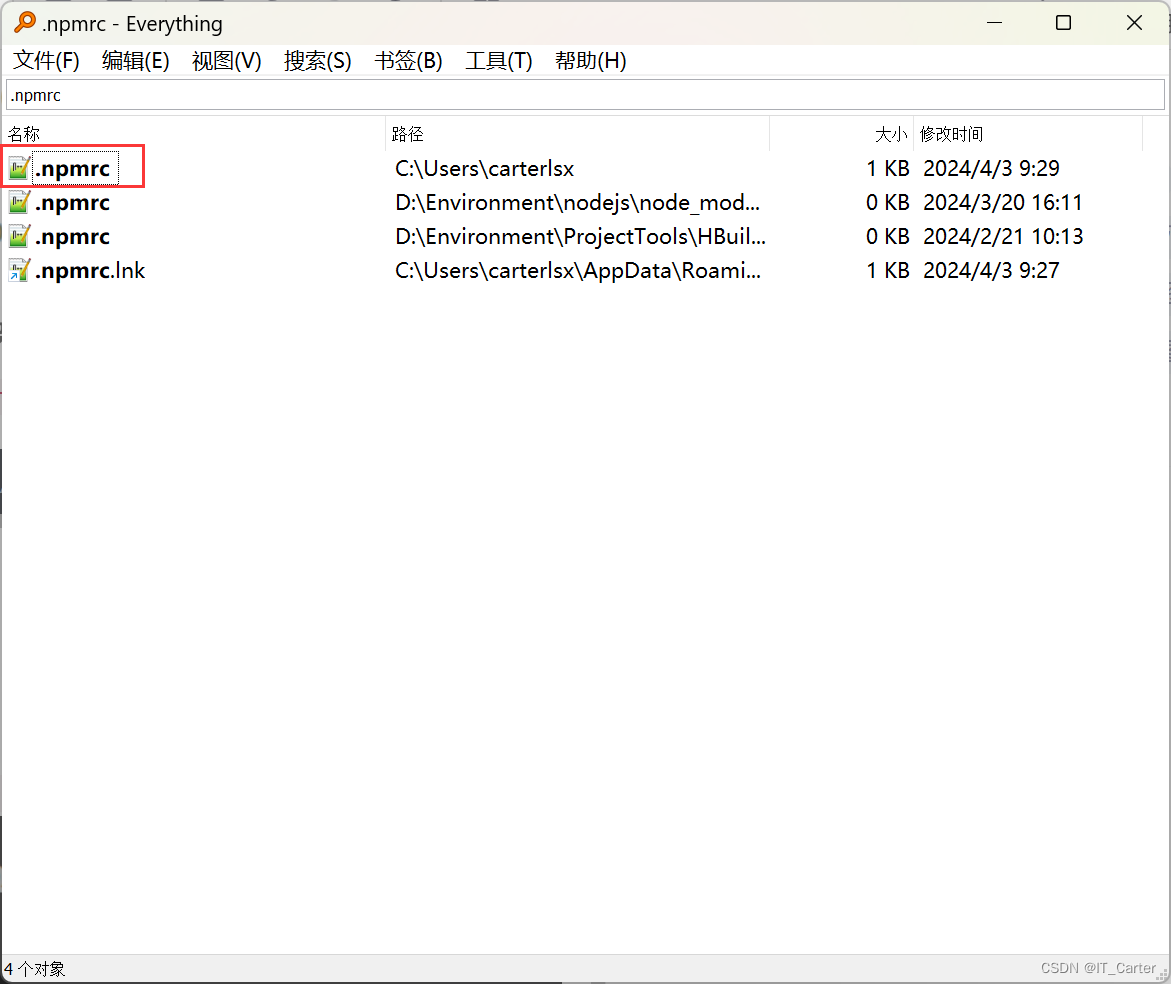
寻找电脑上的 .npmrc:默认c盘下
Everything是一款在系统中快速搜索文件的软件
.npmrc 中添加最后两行
prefix=D:\Environment\nodejs\node_global
cache=D:\Environment\nodejs\node_cache
registry=https://registry.npmmirror.com/
disturl=https://registry.npmmirror.com/-/binary/node
electron_mirror=https://registry.npmmirror.com/-/binary/electron/
- 下载依赖
npm install --save-dev electron
npm install --save-dev @electron-forge/cli
npm exec --package=@electron-forge/cli -c "electron-forge import"
npm install --save-dev @electron-forge/plugin-fuses
- 控制台输出
# 运行预览打包后的exe
npm run start
# 构建分发包形成单个exe
npm run make
- Windows下成功打包exe
electron-forge 会检测当前系统是Windows,还是Linux,最终分发成.exe、.deb或.rpm都是看你当前执行 npm run make
# 当然你可以强制修改平台,通过添加参数platform
  "scripts": {
    "start": "electron-forge start",
    "package": "electron-forge package",
    "make": "electron-forge make --platform=linux"
  },
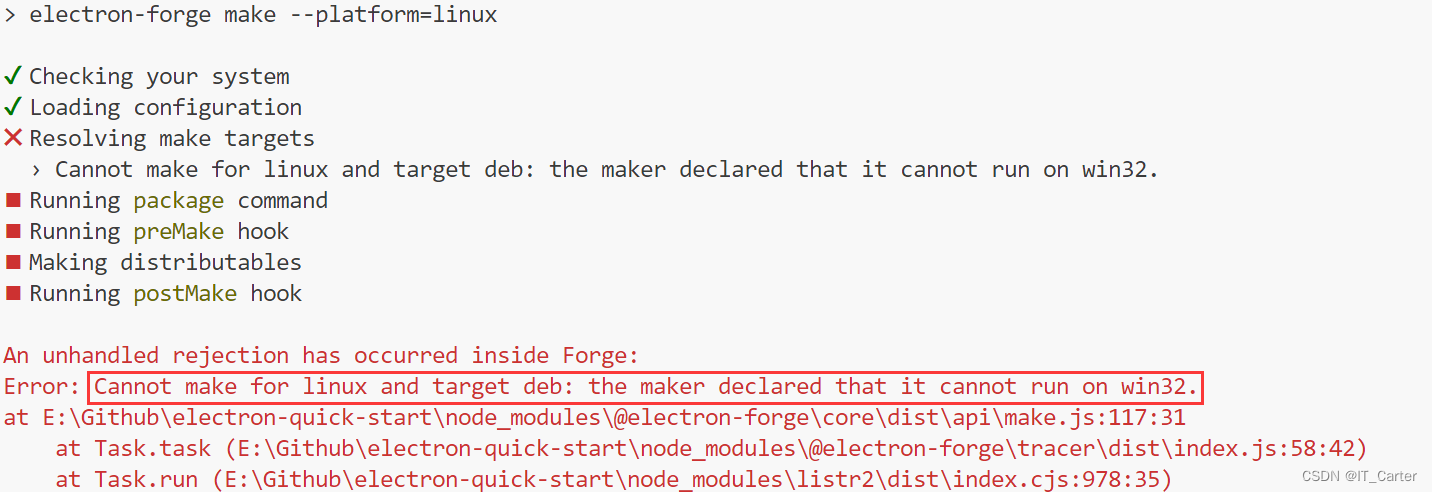
But ERROR
Windows 上打包成 .deb不被允许
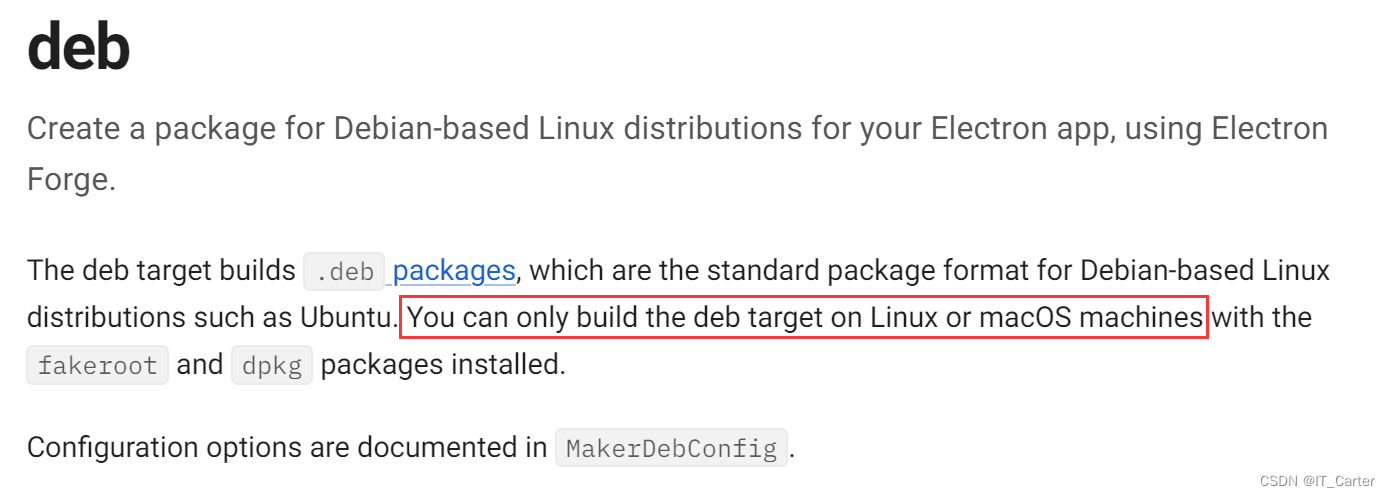
依据 electronforge 官网解释
Electron Forge 官网 deb 描述
你只能在 Linux 或者 macOS操作系统上打包 deb 文件,因此 Windows 操作系统下无法构建.deb的哦!!!
参考网站:
-
electronforge官网
-
ruoyi-vue | electron打包教程(超详细)
-
将Vue项目打包为Windows应用(.exe)
-
electron-forge 流水线踩坑记录
-
- Windows下成功打包exe
- 控制台输出
- 下载依赖
- 2.1 配置npm
- 2.4 进入 package.json
- 2.3 入口文件 main.js ,修改打包的文件路径为我们的index.html
- 2.2 将 Vue 打包后的dist放入项目 electron-quick-start 根目录上
- 2.1 删除 index.html 和 package-lock.json
-
-
- 修改后
-


