Vue3+Vite+TS+Pinia+ElementPlus+Router+Axios创建项目
目录
- 初始项目组成
- 1. 创建项目
- 1.1 下载项目依赖
- 1.2 项目自动启动
- 1.3 src 别名设置
- vite.config.ts配置文件
- tsconfig.json配置
- 若新创项目ts提示
- 1.4 运行测试
- 2. 清除默认样式
- 2.1 样式清除代码下载
- 2.2 src下创建公共样式文件夹`style`
- 2.3 main.js中引入样式
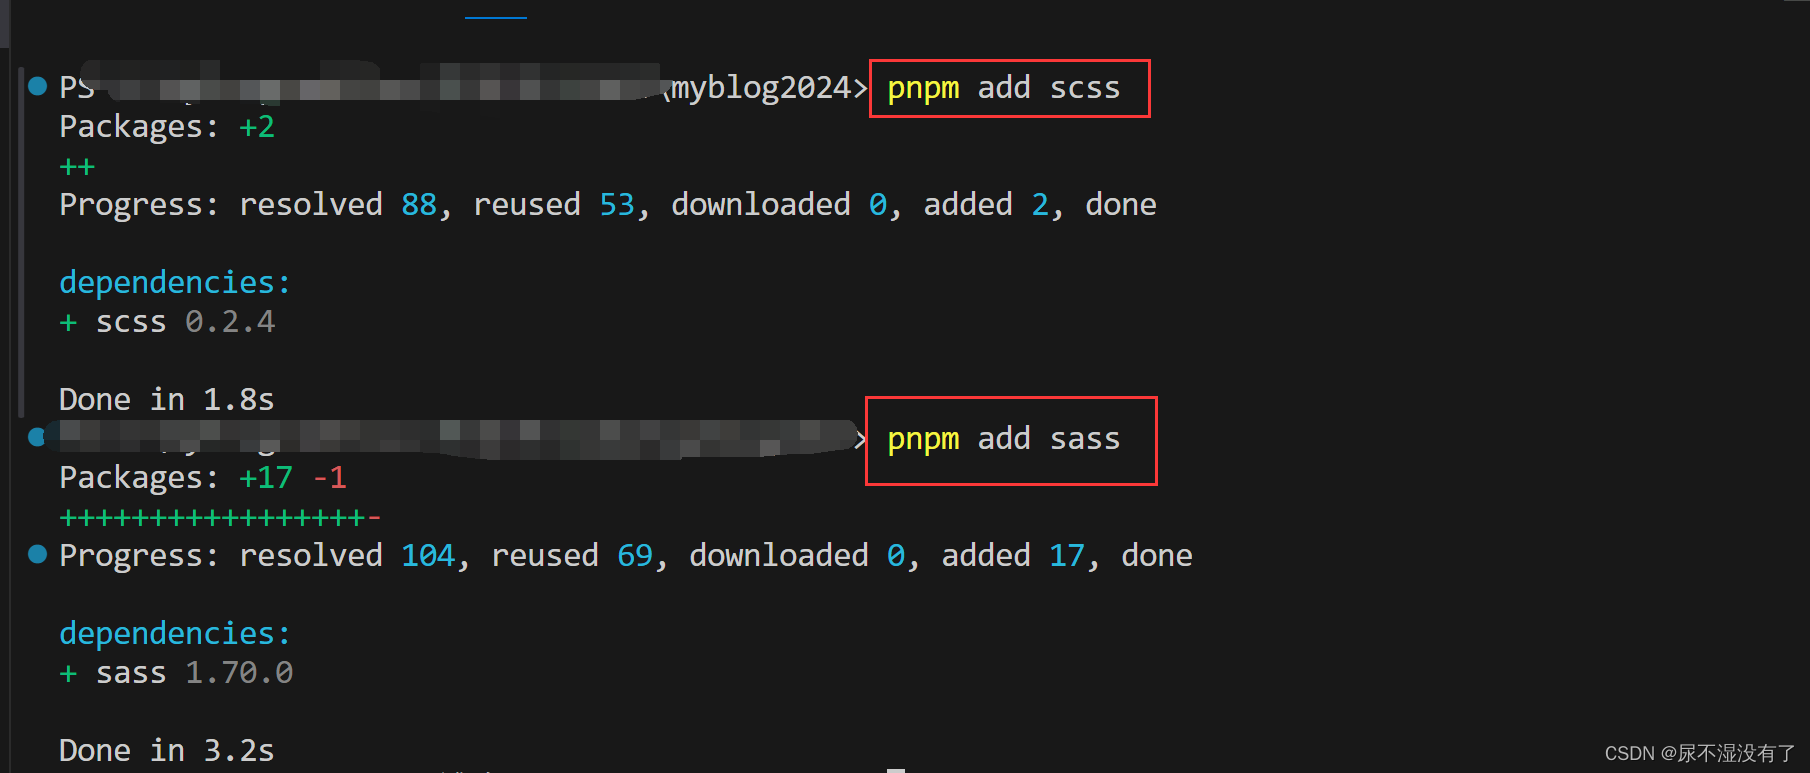
- 2.4 安装`sass`解析插件
- 2.5 运行测试
- 3. Router-路由插件
- 4. UI(Element-Plus)
- 5. Axios
- 5.1 安装
- 5.2 简单配置axios
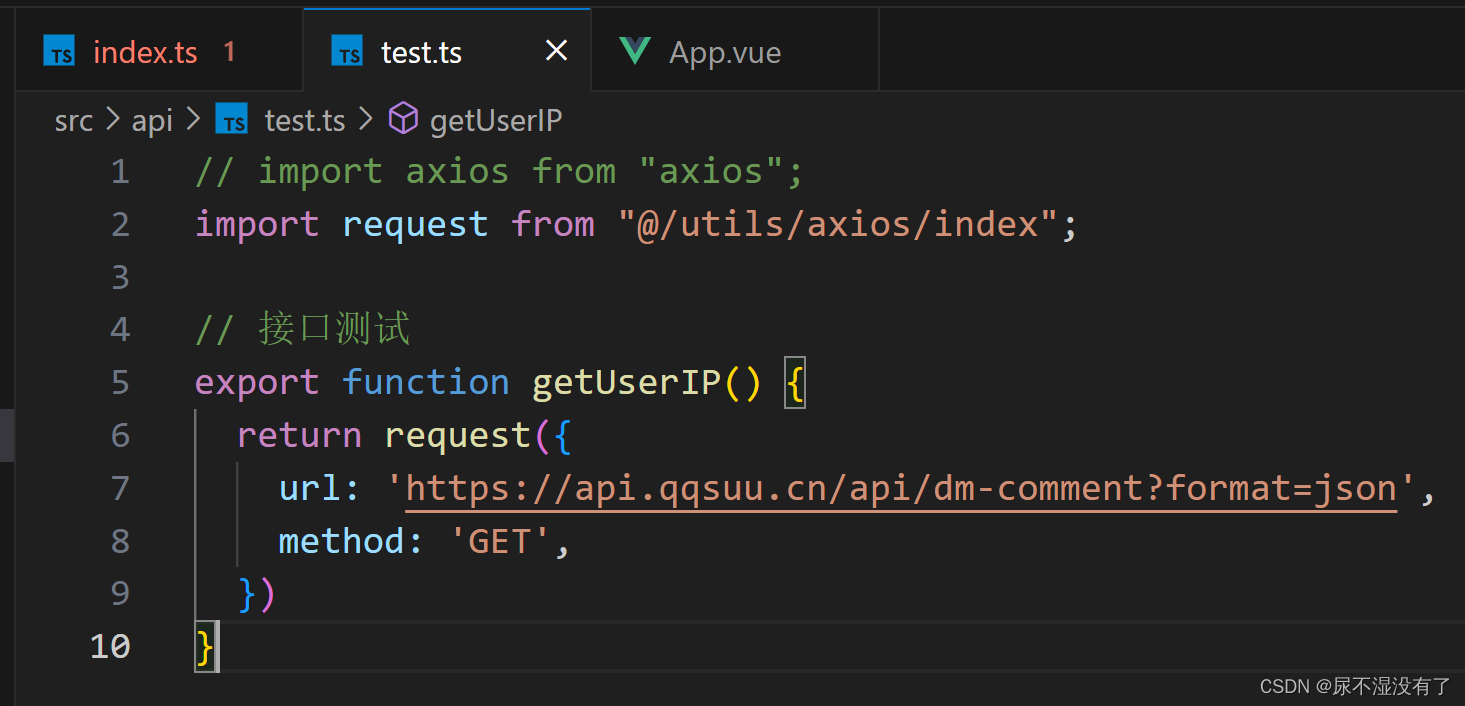
- 5.3 测试api接口
- 6. pinia-状态管理
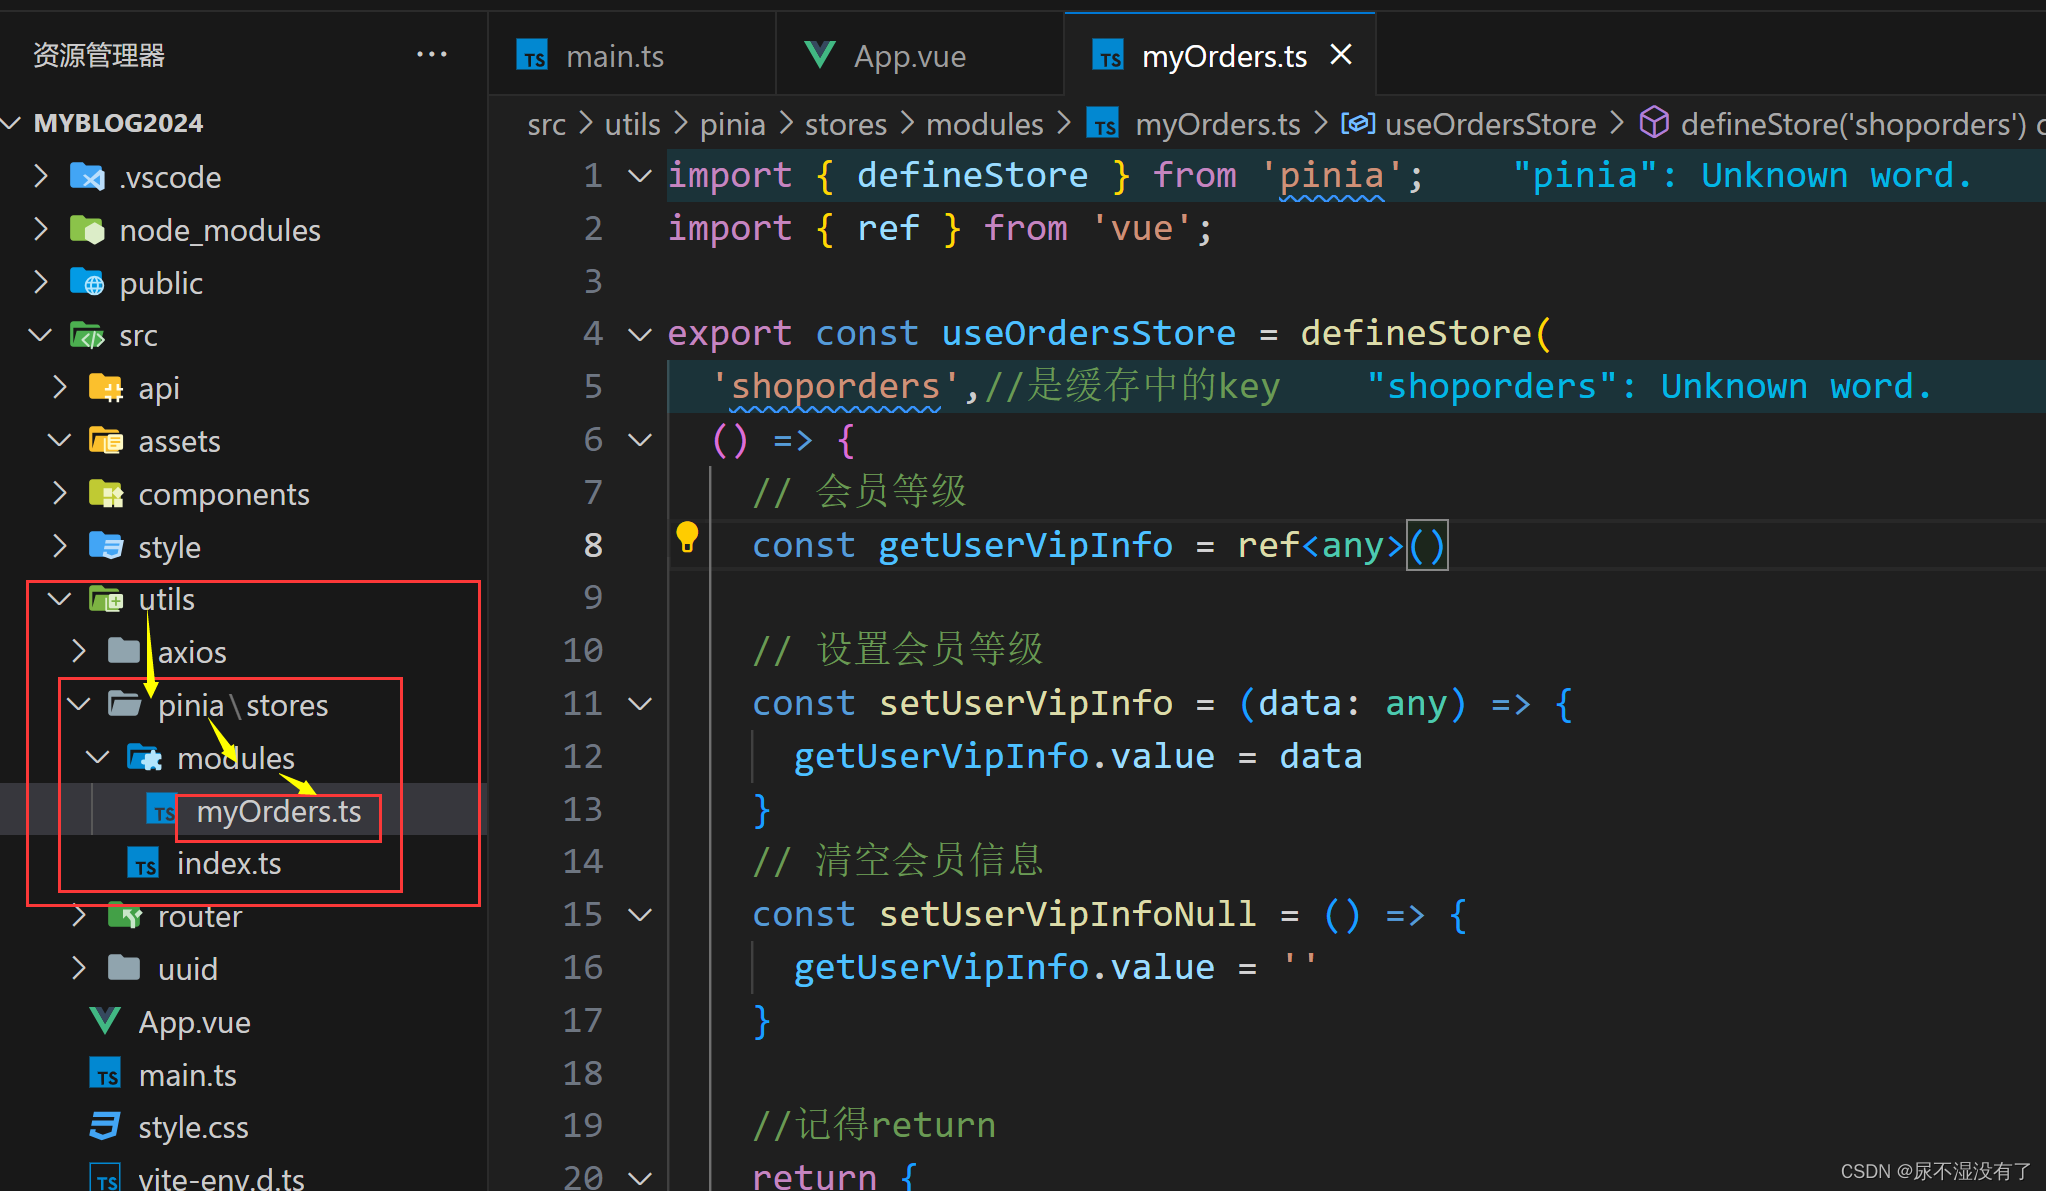
- 6.1 pinia文件
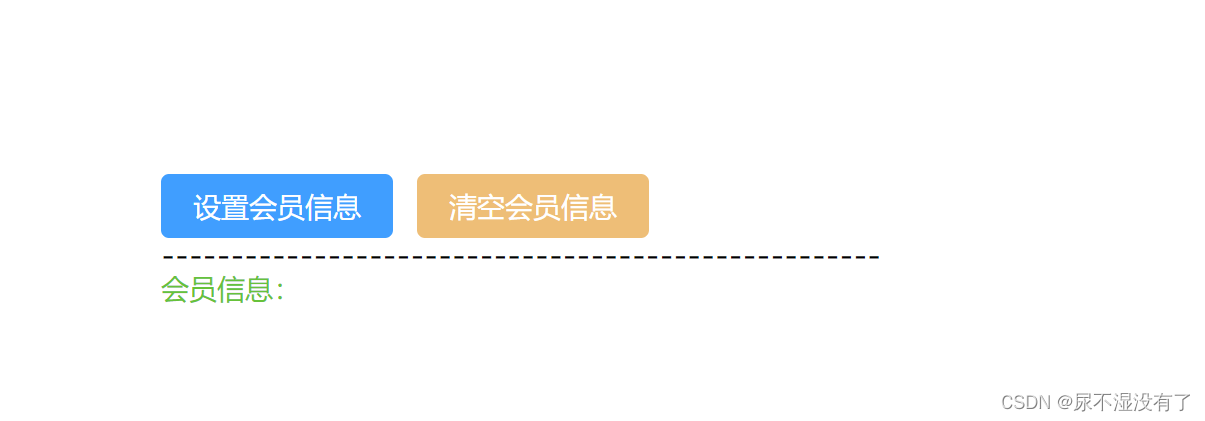
- 6.2 测试组件
初始项目组成
- 框架:Vue3
- 打包构建工具:Vite
- 网络请求:Axios
- 状态保持:Pinia
- 路由:Router
- 交互:TypeScript
- UI:Element-Plus
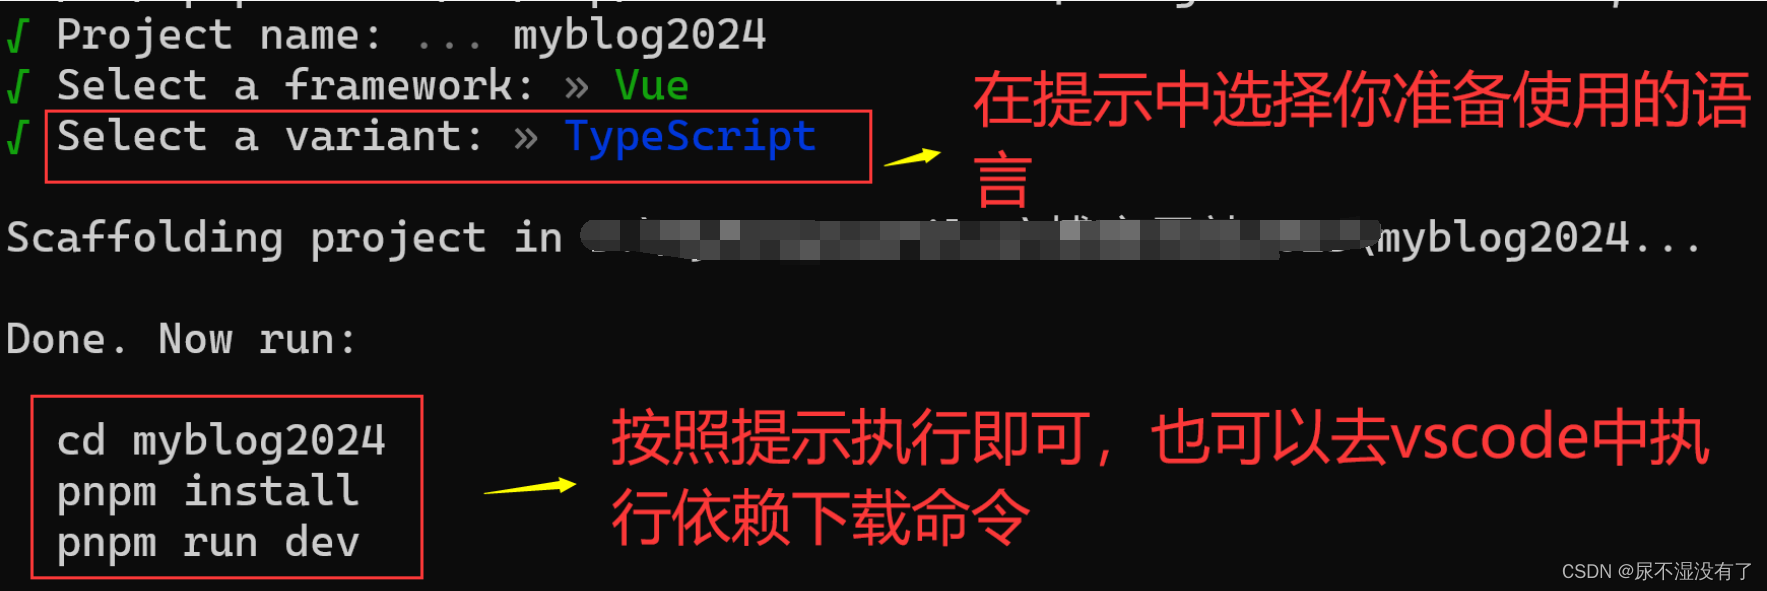
1. 创建项目
镜像切换(如果你的网络不好建议切换为阿里云国内镜像)
npm install -g cnpm --registry=https://registry.npm.taobao.org
pnpm create vite@latest
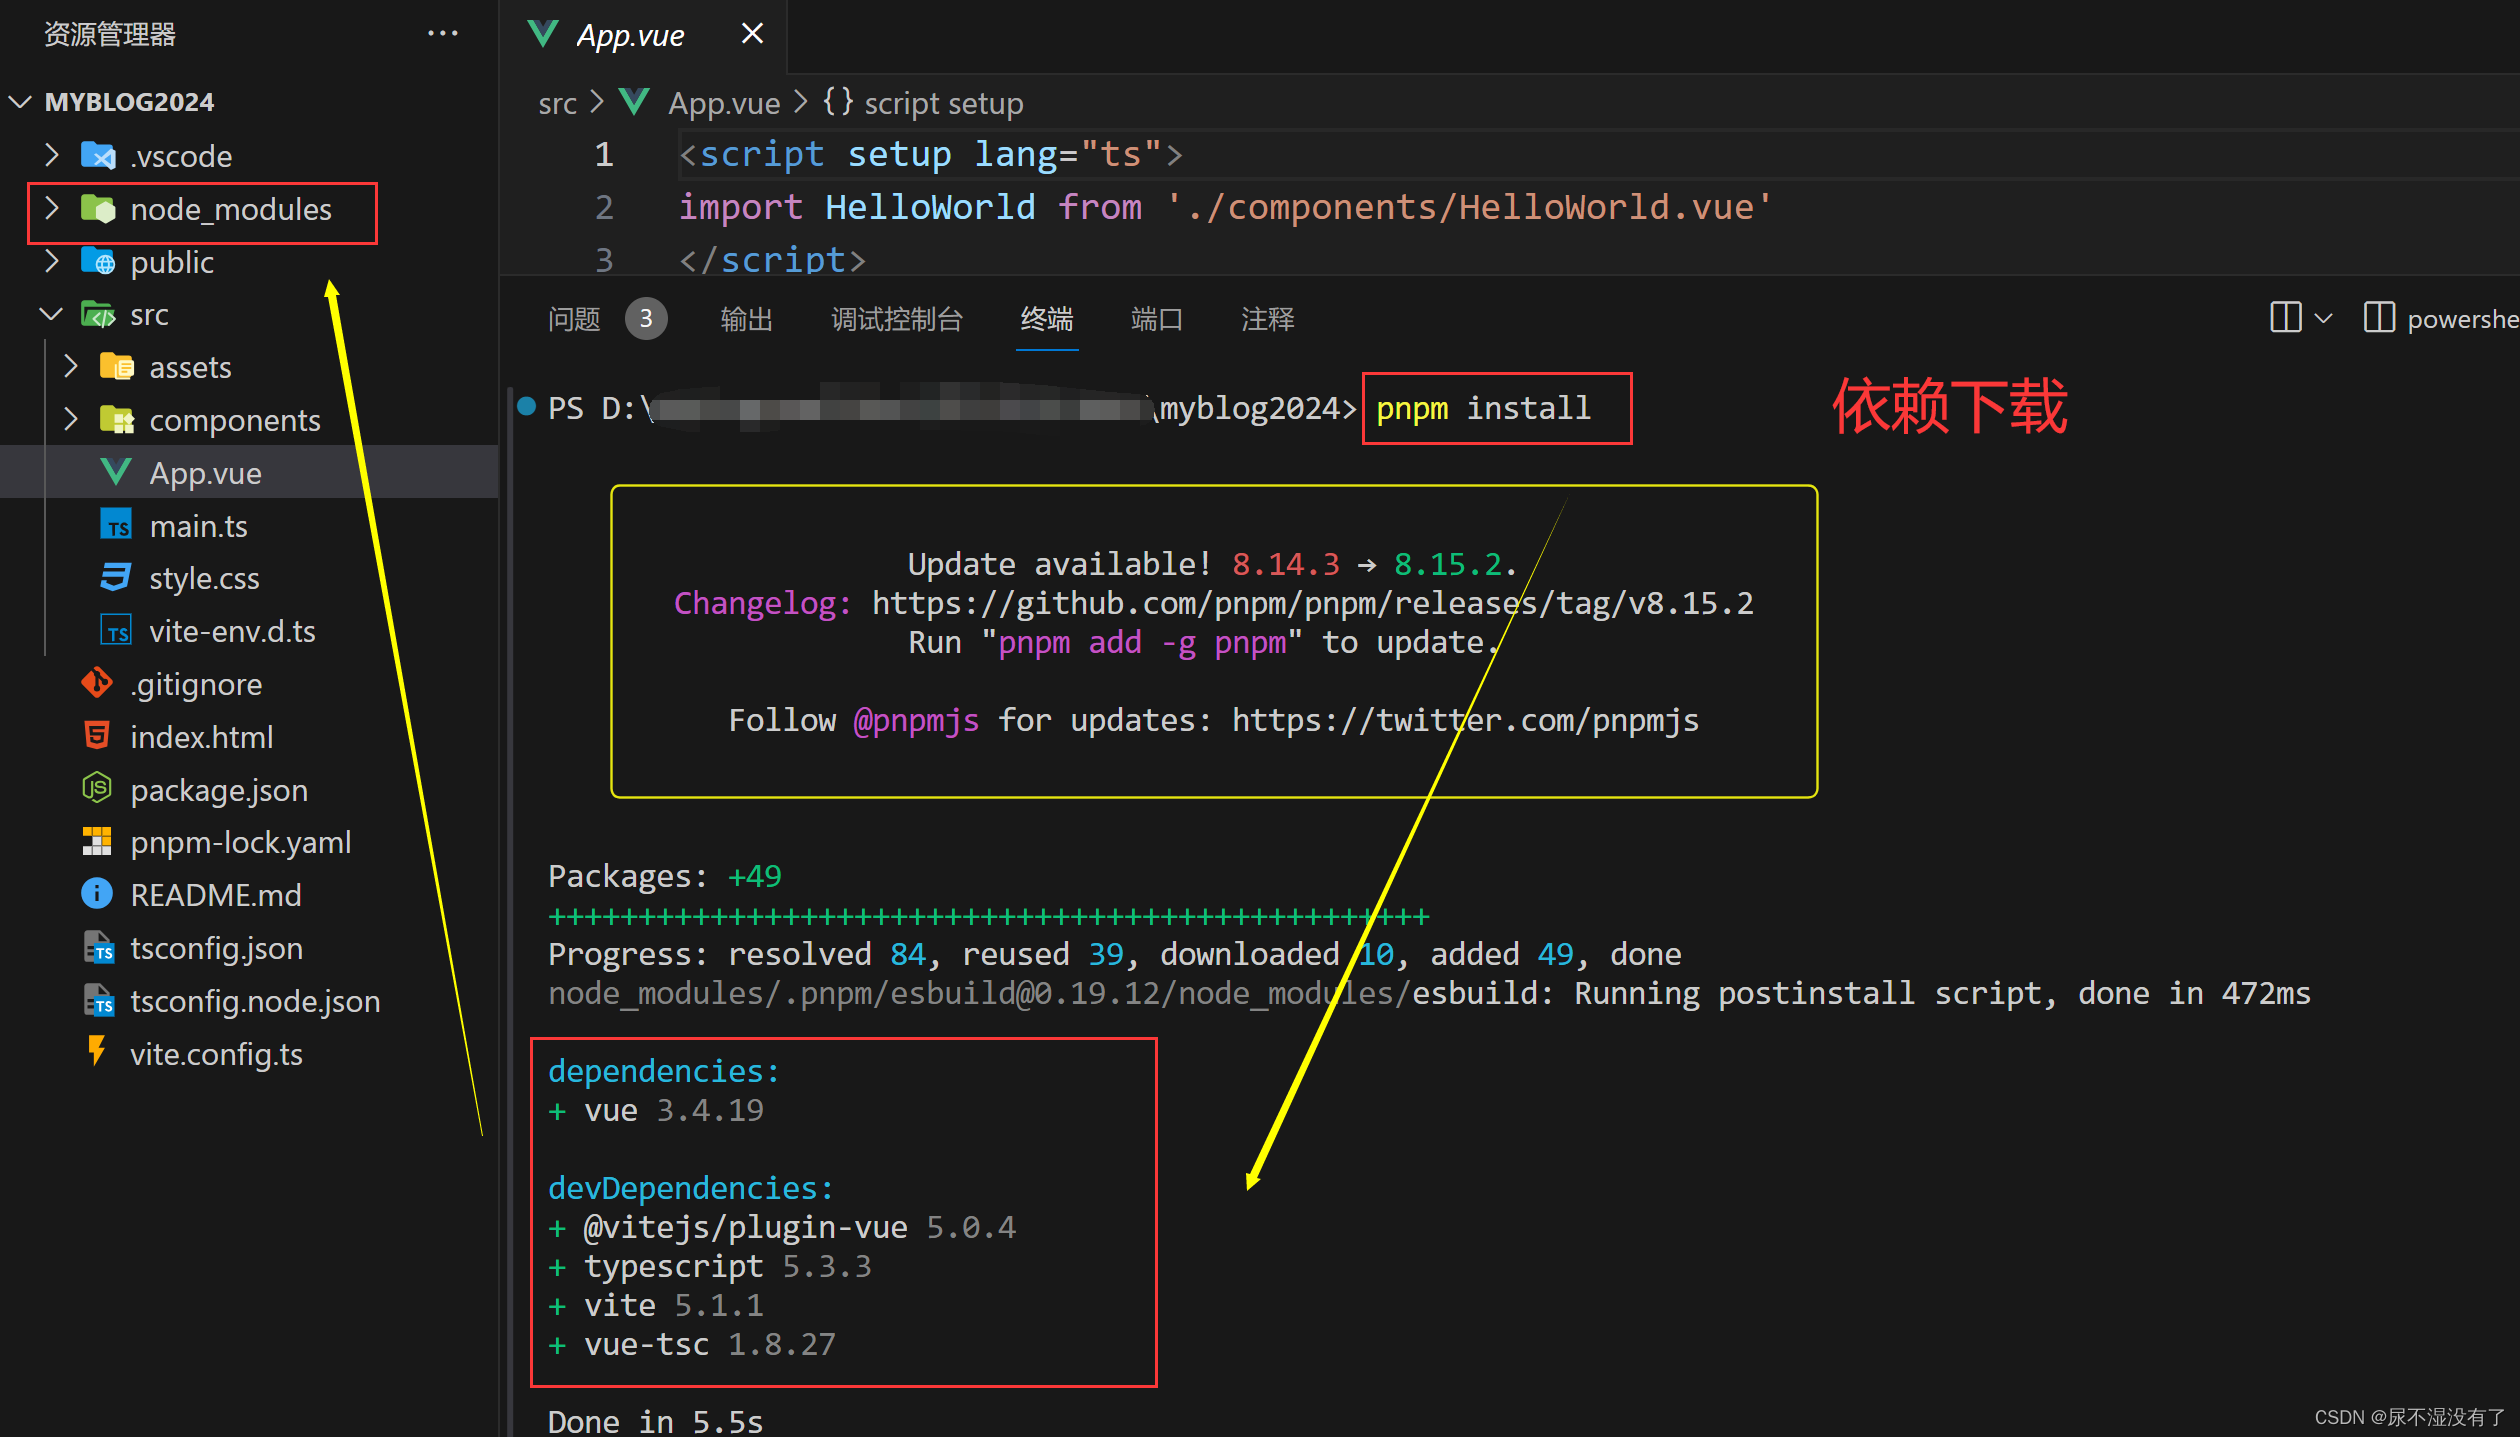
1.1 下载项目依赖
- 打开vscode在控制台终端输入pnpm install(或你使用的下载器命令)
注意:vscode中写vue3时,若安装了vetur插件你应该将它禁用掉,下载volar:搜索结果的第一个(vue)和第二个(ts),否则会有冲突,相反~
1.2 项目自动启动
{
  "name": "myblog2024",
  "private": true,
  "version": "0.0.0",
  "type": "module",
  "scripts": {
    "dev": "vite --open", # 可以自动打开浏览器(JSON配置文件中不能有注释的可以去设置)
    "build": "vue-tsc && vite build",
    "preview": "vite preview"
  },
  "dependencies": {
    "vue": "^3.4.15"
  },
  "devDependencies": {
    "@vitejs/plugin-vue": "^5.0.3",
    "typescript": "^5.2.2",
    "vite": "^5.1.0",
    "vue-tsc": "^1.8.27"
  }
}
1.3 src 别名设置
vite.config.ts配置文件
import { defineConfig } from 'vite'
import vue from '@vitejs/plugin-vue'
// 引入node内置模块path:可以获取绝对路径(找不到模块“path”或其相应的类型声明。ts(2307))
import path from 'path'
// https://vitejs.dev/config/
export default defineConfig({
  plugins: [vue()],
  resolve: {
    alias: {
       // (找不到模块“__dirname”或其相应的类型声明。ts(2304))
        // node提供的path中的全局变量:__dirname用来获取绝对路径
      "@":path.resolve(__dirname,'src')//@ 表示 src
    }
  }
})
TIP
若出现红色语法提示说"xxx模块找不到或类型未声明",就去安装一下@types/node是Typescript的一个声明文件包,用于描述node.js核心模块和常使用的第三方库的类型信息
pnpm add @types/node --save-dev
tsconfig.json配置
在该配置文件中在compilerOptions添加配置,这一步的作用是让IDE可以对路径进行智能提示
"baseUrl": ".",
    "paths": {
      "@/*":["src/*"]
    }
完整配置如下:
{
  "compilerOptions": {
    "target": "ES2020",
    "useDefineForClassFields": true,
    "module": "ESNext",
    "lib": [
      "ES2020",
      "DOM",
      "DOM.Iterable"
    ],
    "skipLibCheck": true,
    "baseUrl": ".",
    "paths": {
      "@/*": [
        "src/*"
      ]
    },
    /* Bundler mode */
    "moduleResolution": "bundler",
    "allowImportingTsExtensions": true,
    "resolveJsonModule": true,
    "isolatedModules": true,
    "noEmit": true,
    "jsx": "preserve",
    /* Linting */
    "strict": true,
    "noUnusedLocals": true,
    "noUnusedParameters": true,
    "noFallthroughCasesInSwitch": true
  },
  "include": [
    "src/**/*.ts",
    "src/**/*.d.ts",
    "src/**/*.tsx",
    "src/**/*.vue"
  ],
  "references": [
    {
      "path": "./tsconfig.node.json"
    }
  ],
}
若新创项目ts提示
找不到模块“…/components/HelloWorld.vue”或其相应的类型声明。ts(2307)
///
// 在env.d.ts文件中 加入下面代码
declare module "*.vue" {
    import type { DefineComponent } from "vue";
    const vueComponent: DefineComponent}, {}, any;
    export default vueComponent;
}
1.4 运行测试
pnpm run dev
2. 清除默认样式
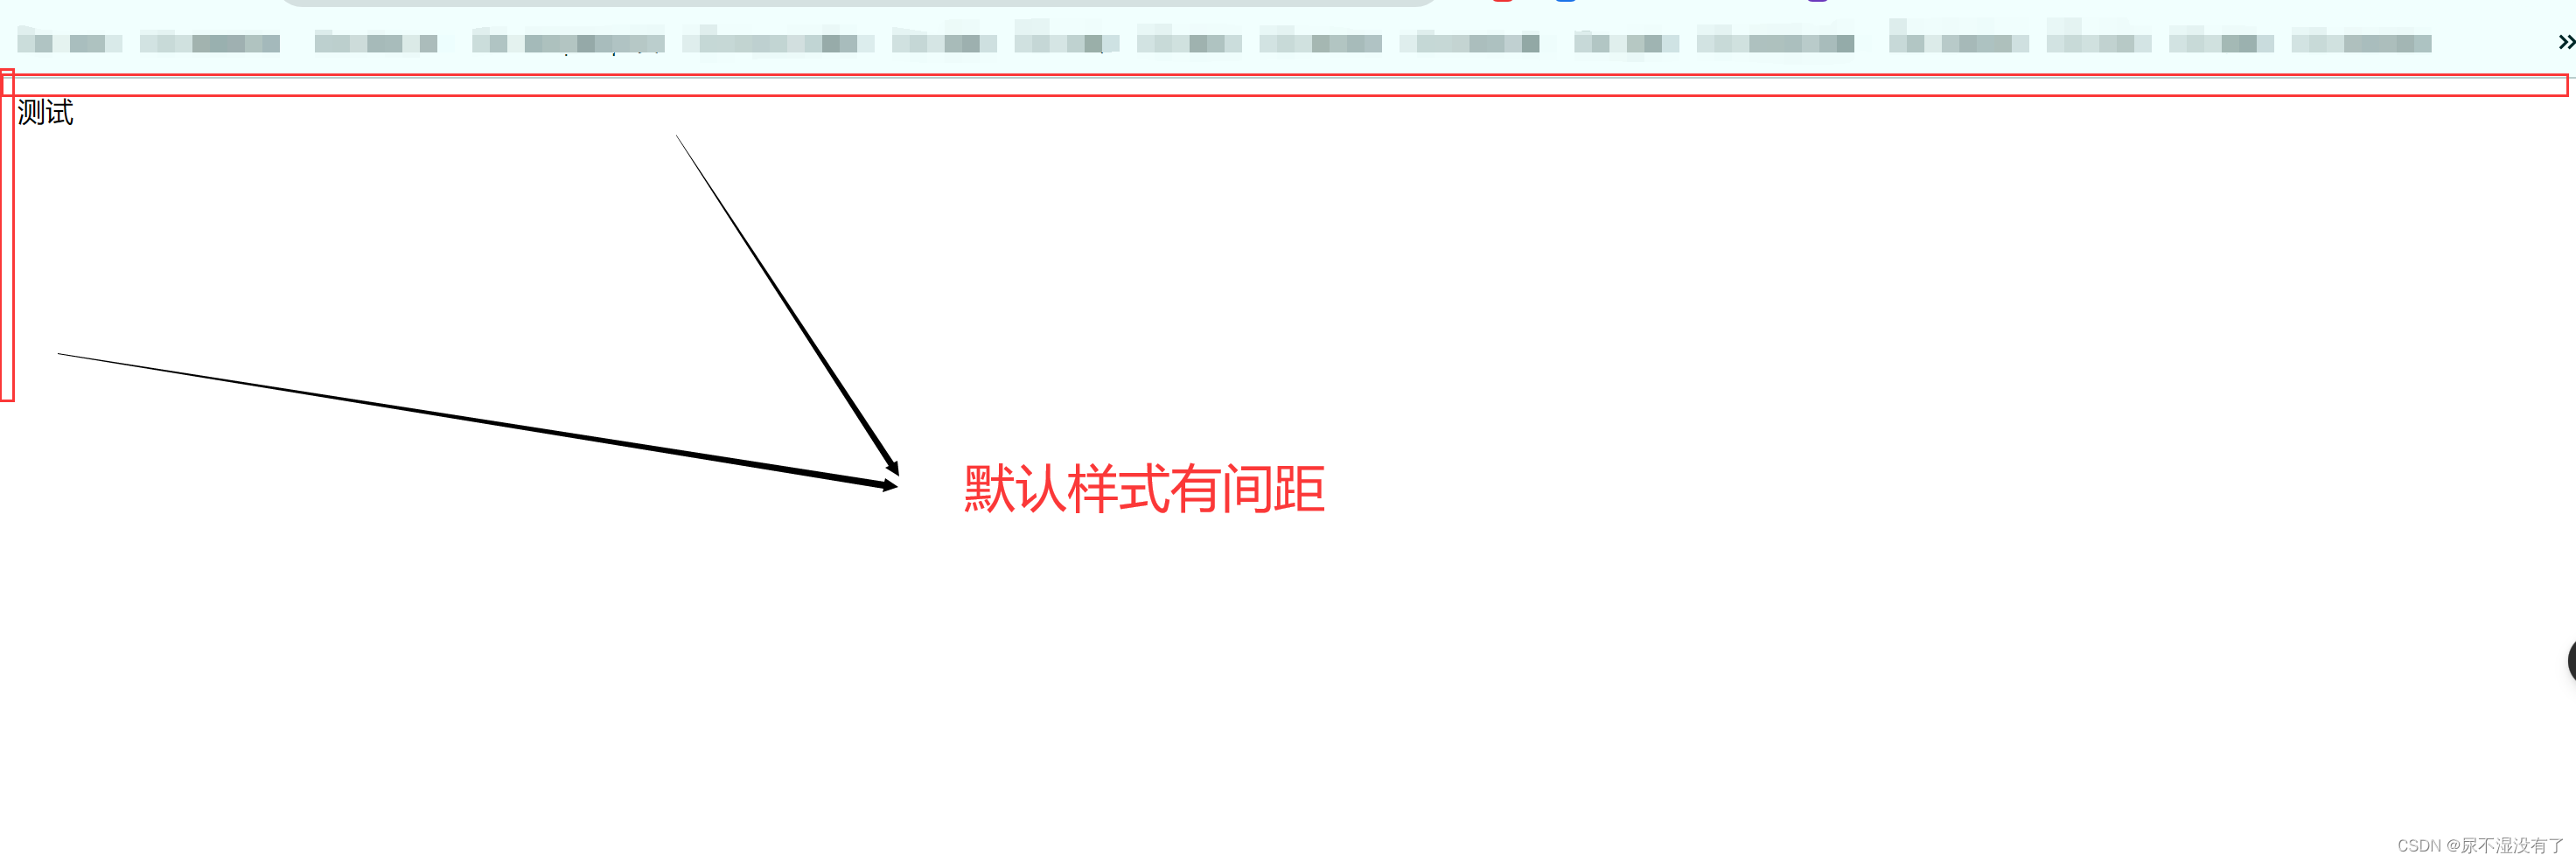
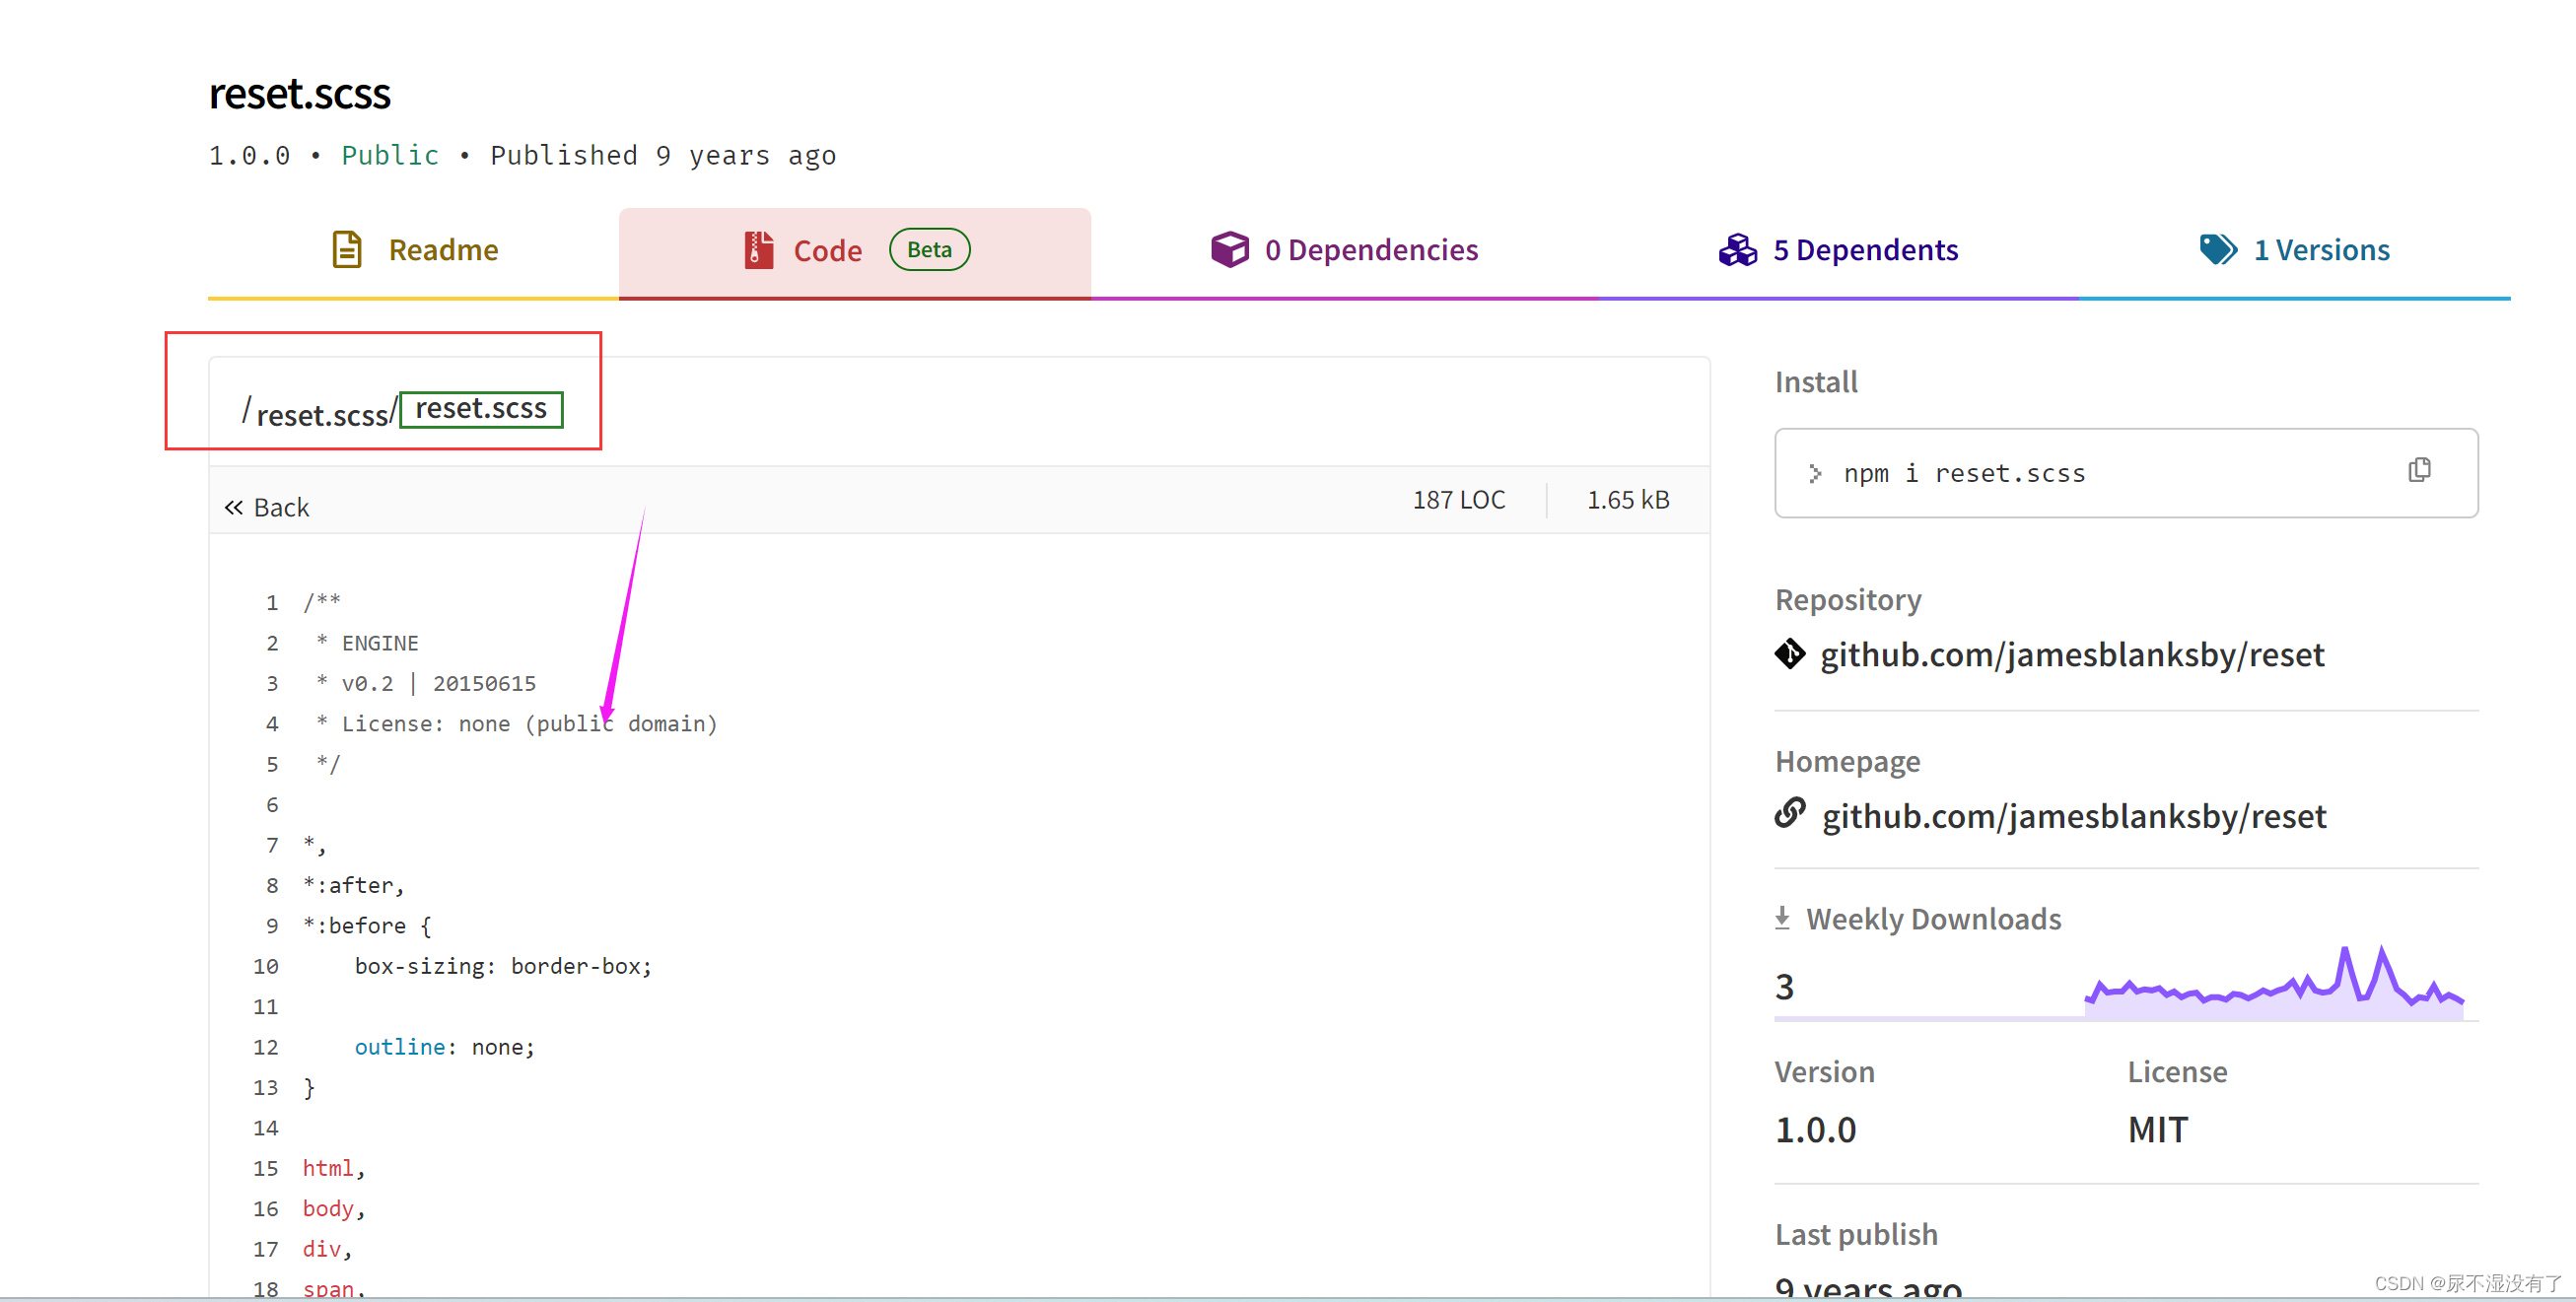
清除默认样式,不清除则四周有白边:https://www.npmjs.com/package/reset.scss?activeTab=code
2.1 样式清除代码下载
*,
*:after,
*:before {
  box-sizing: border-box;
  outline: none;
}
html,
body,
div,
span,
applet,
object,
iframe,
h1,
h2,
h3,
h4,
h5,
h6,
p,
blockquote,
pre,
a,
abbr,
acronym,
address,
big,
cite,
code,
del,
dfn,
em,
img,
ins,
kbd,
q,
s,
samp,
small,
strike,
strong,
sub,
sup,
tt,
var,
b,
u,
i,
center,
dl,
dt,
dd,
ol,
ul,
li,
fieldset,
form,
label,
legend,
table,
caption,
tbody,
tfoot,
thead,
tr,
th,
td,
article,
aside,
canvas,
details,
embed,
figure,
figcaption,
footer,
header,
hgroup,
menu,
nav,
output,
ruby,
section,
summary,
time,
mark,
audio,
video {
  font: inherit;
  font-size: 100%;
  margin: 0;
  padding: 0;
  vertical-align: baseline;
  border: 0;
}
article,
aside,
details,
figcaption,
figure,
footer,
header,
hgroup,
menu,
nav,
section {
  display: block;
}
body {
  line-height: 1;
}
ol,
ul {
  list-style: none;
}
blockquote,
q {
  quotes: none;
  &:before,
  &:after {
    content: '';
    content: none;
  }
}
sub,
sup {
  font-size: 75%;
  line-height: 0;
  position: relative;
  vertical-align: baseline;
}
sup {
  top: -.5em;
}
sub {
  bottom: -.25em;
}
table {
  border-spacing: 0;
  border-collapse: collapse;
}
input,
textarea,
button {
  font-family: inhert;
  font-size: inherit;
  color: inherit;
}
select {
  text-indent: .01px;
  text-overflow: '';
  border: 0;
  border-radius: 0;
  -webkit-appearance: none;
  -moz-appearance: none;
}
select::-ms-expand {
  display: none;
}
code,
pre {
  font-family: monospace, monospace;
  font-size: 1em;
}
2.2 src下创建公共样式文件夹style
在style下创建reset.scss文件,然后将2.1步骤中的代码复制进去。
2.3 main.js中引入样式
// 引入清除默认样式scss
import '@/style/reset.scss'
//将main.js中原来的删除掉
//import './style.css' //删除掉
2.4 安装sass解析插件
pnpm add sass
pnpm add scss
2.5 运行测试
间距已经清除
❀❀❀❀❀❀❀❀❀❀❀❀❀❀❀❀❀❀❀❀❀❀❀❀❀❀❀❀❀❀❀❀❀❀❀❀❀❀❀❀❀❀❀❀❀❀❀❀❀❀❀❀❀❀
3. Router-路由插件
官网地址:Router
//安装命令
pnpm add vue-router@4
路由安装
路由配置
- 创建工具文件夹utils
- 创建router/index.ts文件夹
- 在index.ts中配置路由
- main.ts中导入路由
import { createRouter, createWebHistory } from 'vue-router'
// createRouter:创建路由实列,可以管理多个路由
// createWebHistory:创建history模式的路由
const router = createRouter({
  history: createWebHistory(import.meta.env.BASE_URL),
  // 管理路由
  routes: [
	//路由信息
	 // 欢迎页面
    {
      path: '/',
      component: () => import('@/views/welcome/wel.vue')
    },
    // 测试页面
    {
      path: '/test',
      component: () => import('@/views/test/test.vue')
      meta: {
        title: '测试'
      }
    },
  ]
})
// 设置标签title
router.afterEach((to, form) => {
  document.title = to.meta.title || '项目测试'
})
// 默认导出
export default router
main.ts
import { createApp } from 'vue'
import App from './App.vue'
// 引入清除默认样式scss
import '@/style/reset.scss'
//TODO:vue-router-路由
import router from '@/utils/router/index'
// 插件注册
const app = createApp(App);
app.use(router)
4. UI(Element-Plus)
官网地址:Element-Plus
pnpm add element-plus
安装一个element-plus中的icon图标插件
pnpm add @element-plus/icons-vue
main.ts
import { createApp } from 'vue'
import App from './App.vue'
// 引入清除默认样式scss
import '@/style/reset.scss'
//TODO: vue-router-路由
import router from '@/utils/router/index'
//TODO: 引入element-plus插件(主要UI)
import ElementPlus from 'element-plus'
import 'element-plus/dist/index.css'
// element-plus 中的icon
import * as ElementPlusIconsVue from '@element-plus/icons-vue'
//TODO: 实例化vue
const app = createApp(App);
// element-plus:icon
for (const [key, component] of Object.entries(ElementPlusIconsVue)) {
  app.component(key, component)
}
//TODO: 插件注册
app.use(ElementPlus)
app.use(router)
// TODO: 挂载
app.mount('#app')
运行测试
按钮Default Primary Success Info Warning Dangericon5. Axios
5.1 安装
pnpm add axios
5.2 简单配置axios
utils/axios/index.ts
// axios的基础封装
// 导入
import axios from 'axios'
//创建实例
const service = axios.create({
  // 项目基地址
  baseURL: "http://127.0.0.1:5173",
  // 延迟最大5s
  timeout: 5000,
})
//设置请求头
// service.head={
//  'Access-Control-Allow-Origin':'*',  //解决cors头问题
//  'Access-Control-Allow-Credentials':'true', //解决session问题
//  'Content-Type' :'application/json;charset=UTF-8' //将表单数据传递转化为form-data类型
// }
// =================== 拦截器======================
// 添加请求拦截器
service.interceptors.request.use(function (config) {
  // 在发送请求之前做些什么
  return config;
}, function (error) {
  // 对请求错误做些什么
  return Promise.reject(error);
});
// 添加响应拦截器
service.interceptors.response.use(function (response) {
  // 2xx 范围内的状态码都会触发该函数。
  // 对响应数据做点什么
  return response;
}, function (error) {
  // 超出 2xx 范围的状态码都会触发该函数。
  // 对响应错误做点什么
  return Promise.reject(error);
});
//导出
export default service
或者
// 对于axios进行二次封装?
// 目的1:主要是利用axios自带的响应拦截功能
// 目的2:请求拦截器,一般可以在请求头中携带公共的参数:token
// 目的3:响应拦截器,可以简化服务器返回的数据,处理http网络错误
import axios from "axios";
// 利用axios.create方法创建一个axios实例:可以设置基础路径、超时的时间设置
const request = axios.create({
  baseURL: '/api',//请求的基础路径设置
  timeout: 5000,  //超时的时间设置,超出五秒请求就是失败的
});
// 请求拦截器
request.interceptors.request.use((config:any) => {
  // config:请求拦截器回调注入的对象(配置对象),配置对象的身上最重要的一件事情就是headers属性
  // 可以通过请求头携带公共参数-token
  // 列如:
  // config.headers.token = 111222
  return config;
})
// 响应拦截器
request.interceptors.response.use((response:any) => {
  // TOD:响应拦截器成功的回调,一般会进行数据简化
  console.log("响应拦截器:", response);
  return response;
}, (error:any) => {
  //TOD:错误信息
  console.log(error);
  // 处理网络错误
  // let status = error.status
  // switch (status) {
  //   case 404:
  //     //错误提示信息
  //     break;
  //   case 403|202|501|502:
  //     //错误提示信息
  //     break;
  //   default:
  //     break;
  // }
})
// 务必对外暴露
export default request
5.3 测试api接口
- src下面创建一个api文件夹集中管理接口请求
测试
import { getUserIP } from "@/api/test";
//测试api
const getIP = () => {
  getUserIP().then((res) => {
    console.log(res);
  }).catch((err) => {
    console.log(err);
  })
}


  点击进行api测试
6. pinia-状态管理
pnpm add pinia
pnpm add pinia-plugin-persistedstate //数据持久化插件 配合pinia状态管理插件使用
6.1 pinia文件
import { defineStore } from 'pinia';
import { ref } from 'vue';
export const useOrdersStore = defineStore(
  'shoporders',//是缓存中的key
  () => {
    // 会员等级
    const getUserVipInfo = ref()
    // 设置会员等级
    const setUserVipInfo = (data: any) => {
      getUserVipInfo.value = data
    }
    // 清空会员信息
    const setUserVipInfoNull = () => {
      getUserVipInfo.value = ''
    }
    //记得return
    return {
      getUserVipInfo,
      setUserVipInfo,
      setUserVipInfoNull,
    }
  },
  // TODO: 开启持久化
  {
    //仅在网页端有效
    persist: true
    //小程序端配置如下
    // persist: {
    //   storage: {
    //     getItem(key) {
    //       return uni.getStorageSync(key)
    //     },
    //     setItem(key, value) {
    //       return uni.setStorageSync(key, value)
    //     },
    //   }
    // }
  }
)
6.2 测试组件
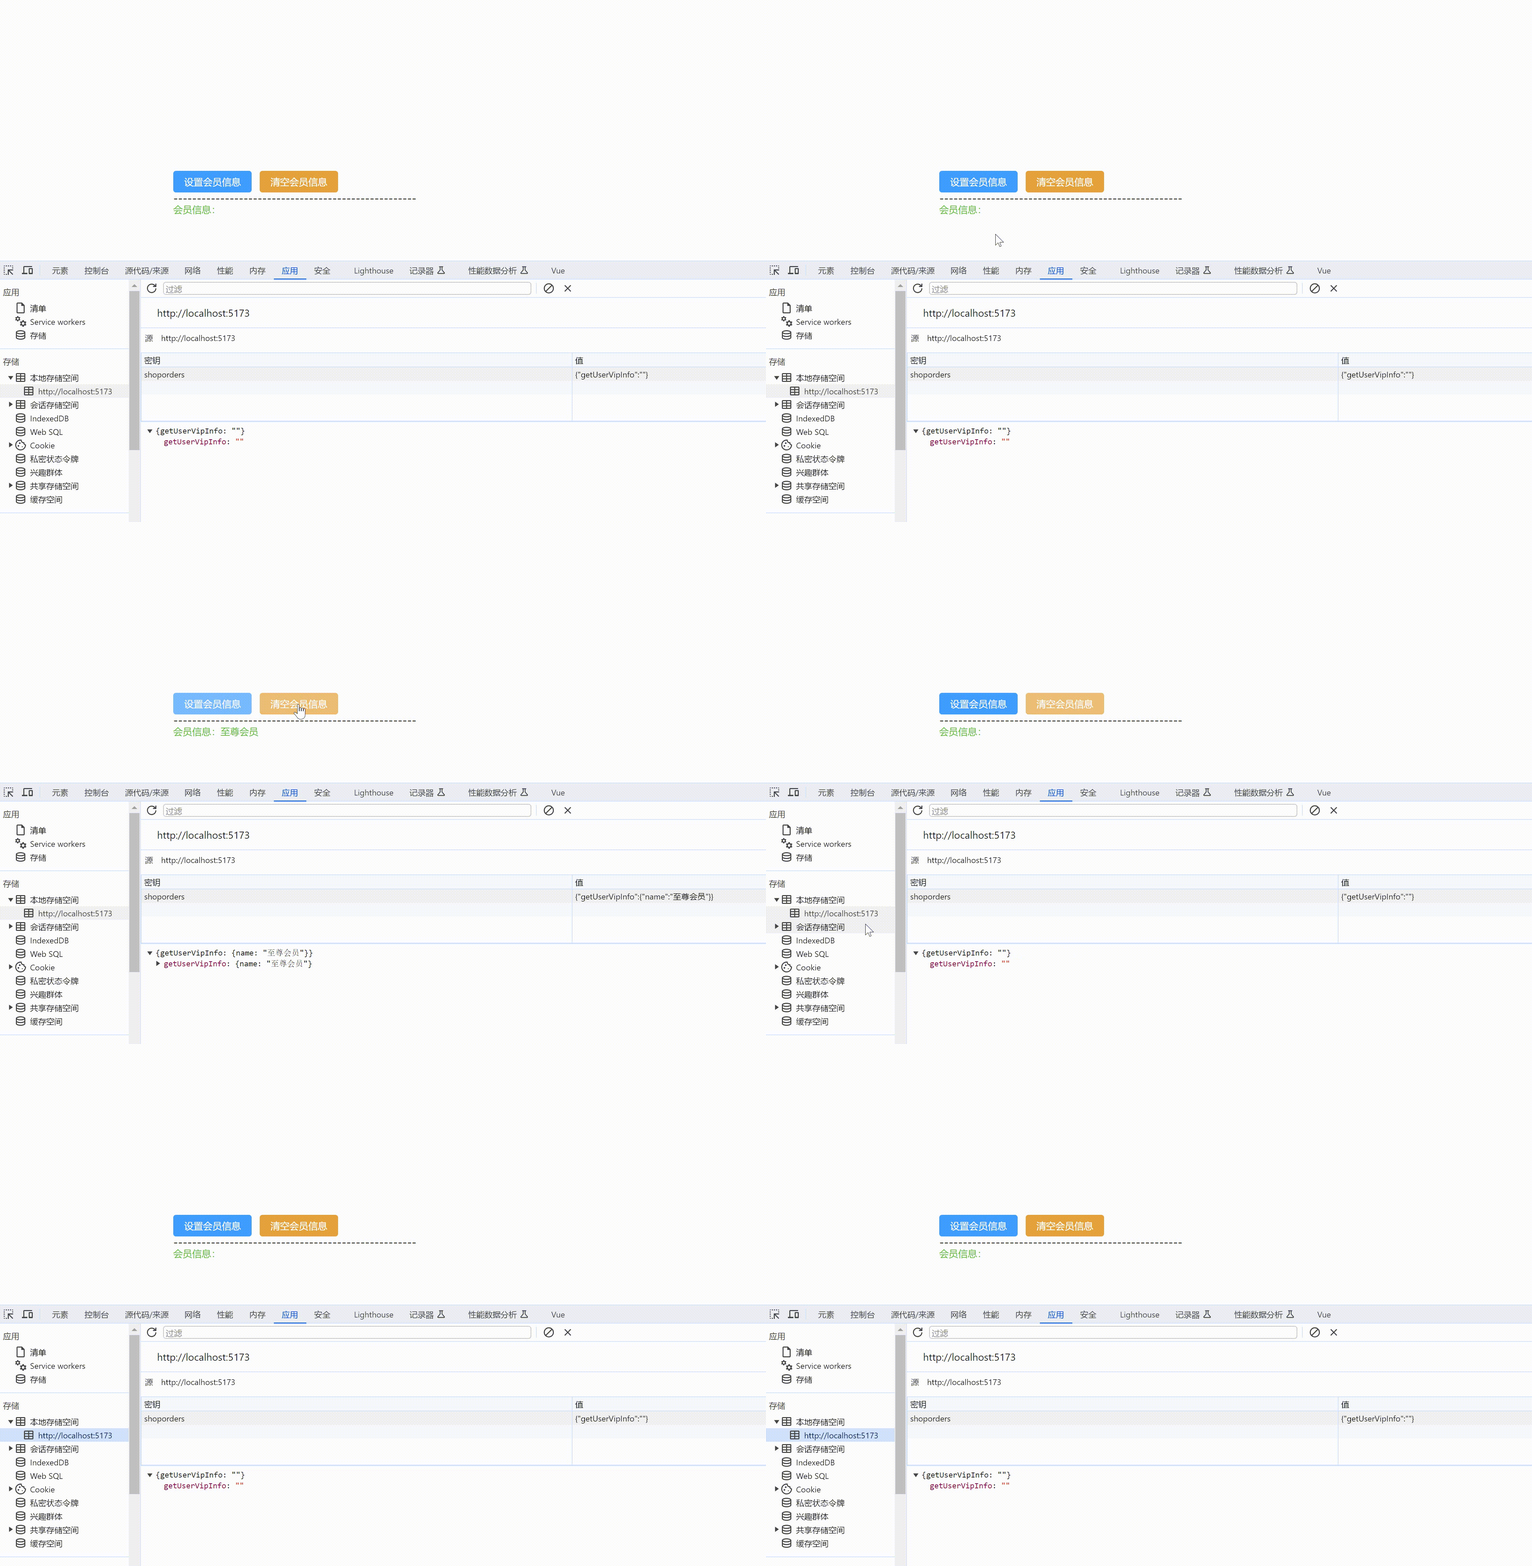
import { useOrdersStore } from "@/utils/pinia/stores/modules/myOrders"; const testPinia = useOrdersStore();设置会员信息 清空会员信息
----------------------------------------------------
会员信息:{{ testPinia.getUserVipInfo.name }}☆★☆★☆★☆★☆★☆★☆★☆★☆★☆★☆★☆★☆★☆★☆★☆★☆★☆★☆★☆★☆★☆★
- src下面创建一个api文件夹集中管理接口请求
- 打开vscode在控制台终端输入pnpm install(或你使用的下载器命令)


